Upload, download, and list blobs with the Azure portal
Create a container
- Navigate to your new storage account in the Azure portal.
- In the left menu for the storage account, scroll to the Data storage section, then select Containers.
- Select the + Container button.
- Type a name for your new container. The container name must be lowercase, must start with a letter or number, and can include only letters, numbers, and the dash (-) character. For more information about container and blob names, see Naming and referencing containers, blobs, and metadata.
- Set the level of public access to the container. The default level is Private (no anonymous access).
- Select Create to create the container.
Upload a block blob
- In the Azure portal, navigate to the container you created in the previous section.
- Select the container to show a list of blobs it contains. This container is new, so it won’t yet contain any blobs.
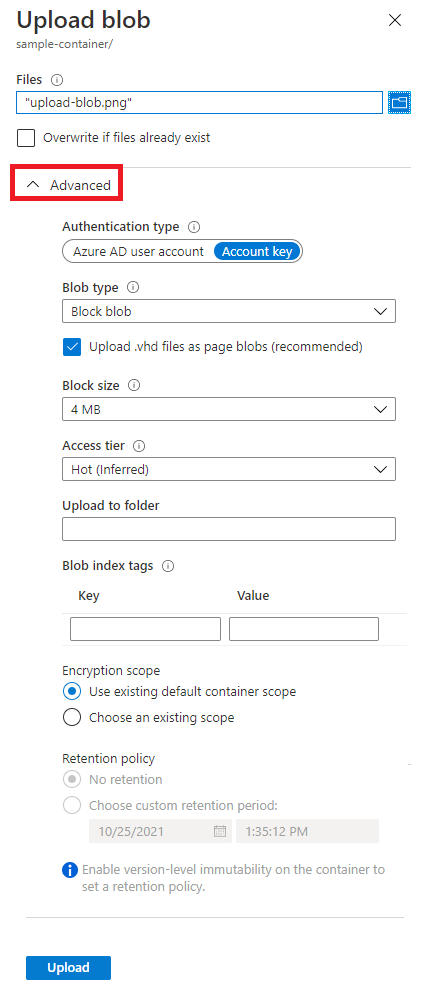
- Select the Upload button to open the upload blade and browse your local file system to find a file to upload as a block blob. You can optionally expand the Advanced section to configure other settings for the upload operation.

- Select the Upload button to upload the blob.
- Upload as many blobs as you like in this way. You’ll see that the new blobs are now listed within the container.
Download a block blob
- Navigate to the list of blobs that you uploaded in the previous section.
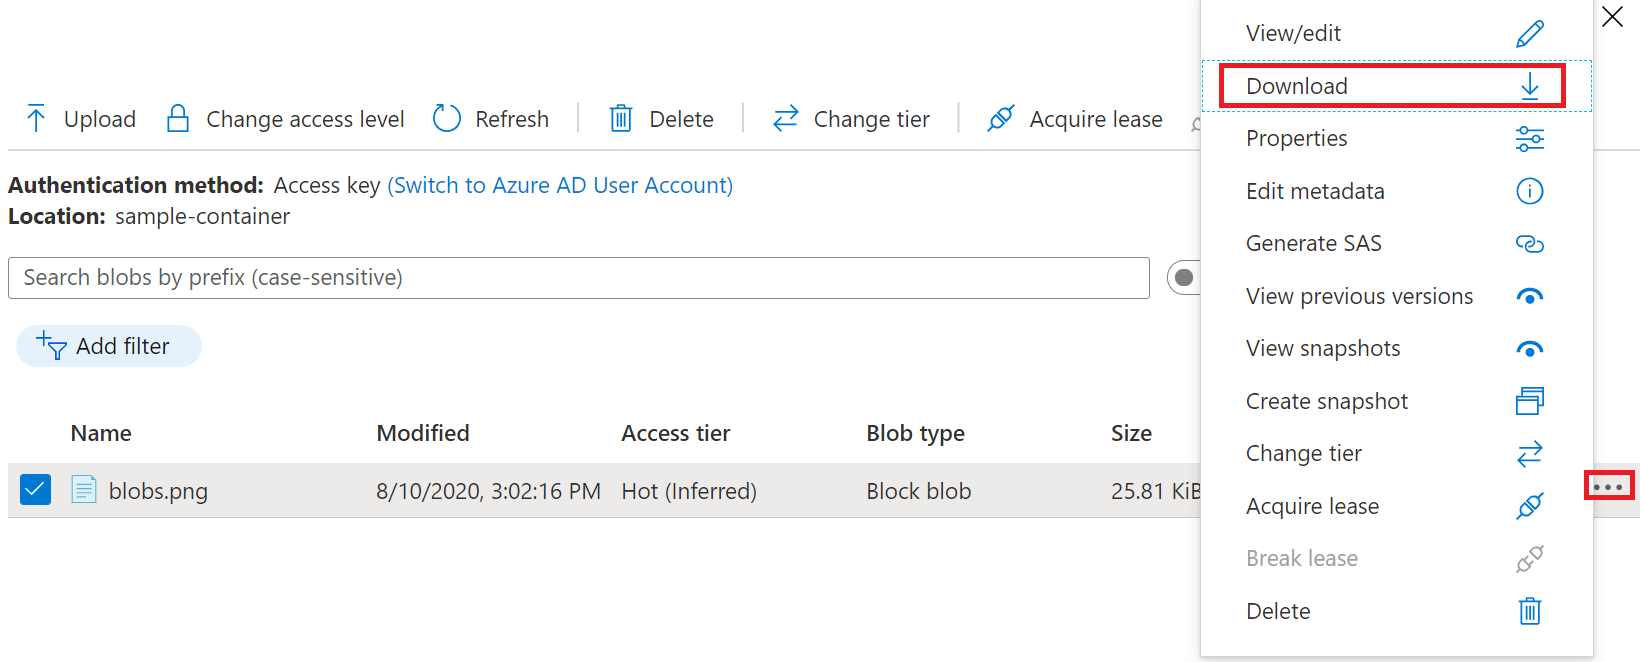
- Right-click the blob you want to download, and select Download.

Delete a block blob
- In the Azure portal, navigate to the container.
- Display the list of blobs in the container.
- Use the checkbox to select one or more blobs from the list.
- Select the Delete button to delete the selected blobs.
- In the dialog, confirm the deletion, and indicate whether you also want to delete blob snapshots.
Tag:Azure


