Creating & connecting a compute engine instance with Windows operating system
- Go to the compute engine service page and then click on Create Instance
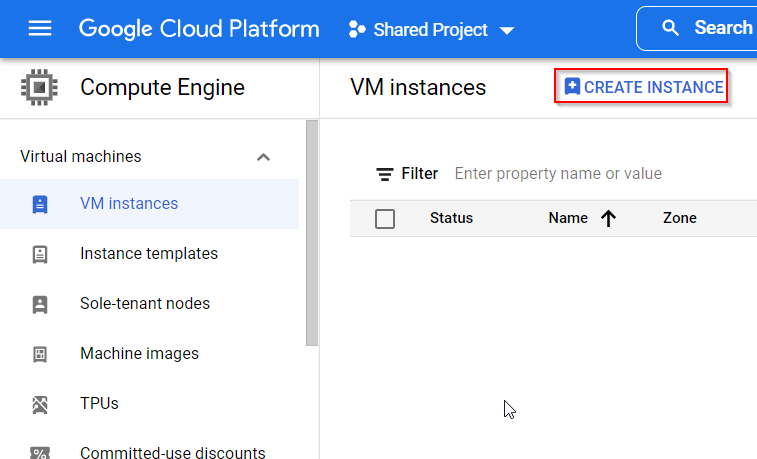
- Now on the create instance page you can fill in a lot of details about your instance so let’s start
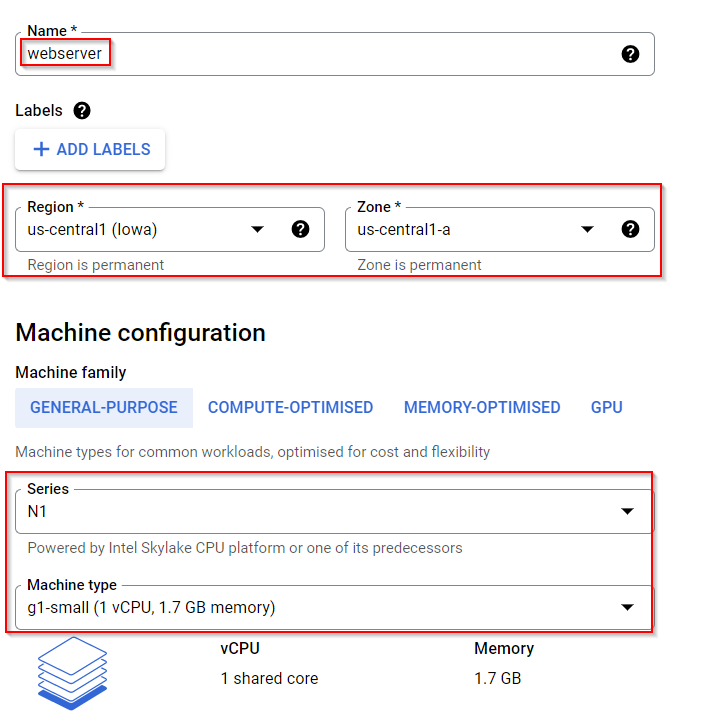
Name: Here you can enter the name of the instance, for example enter the name of the instance as webserver
Label: Here you can add labels to the instance so labels are key-value pair, for example environment: prod
Then you can select the Machine Family for your instance
For the purpose of this demo you will select the Machine series as N1 and machine type as g1-small
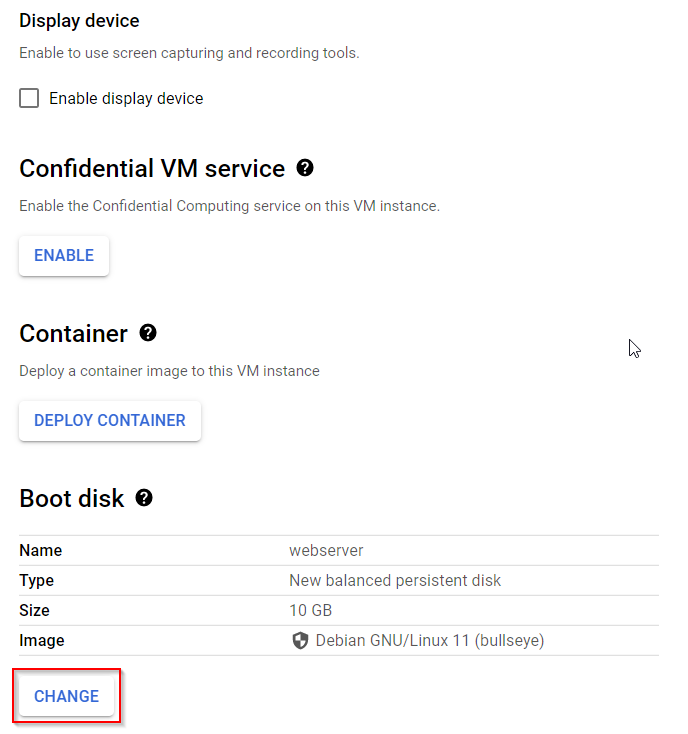
- In this section you would be changing the boot disk
Boot disk is nothing but the operating system disk so whenever you change the boot disk you are ultimately changing the operating system image
So here you will click on Change
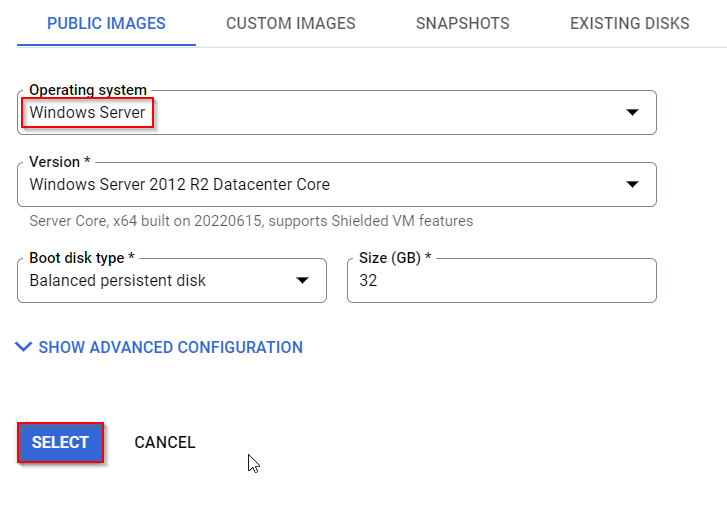
- And you be selecting the operating system is Windows Server then you will click on Select
- Once the instance is created you would be able to see the instance in the dashboard
- now you need to click on the arrow button beside RDP and then you need to click on set windows password
This will basically open a dialog box where you can set the username and password for your windows machine
- In this dialog box you can set the username for this windows machine
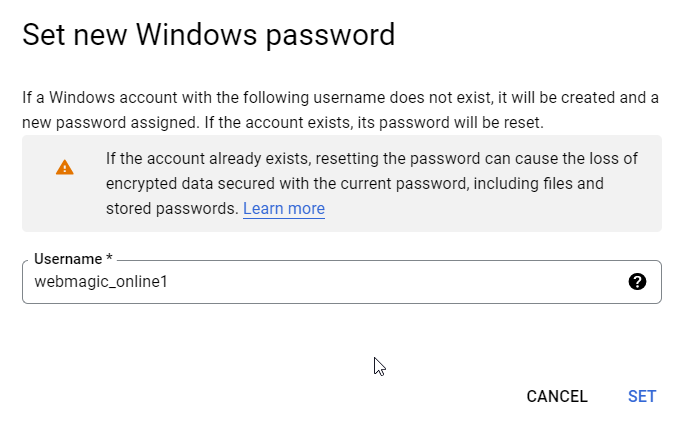
- Once you have set the username for this windows machine there would be a password which would be generated for you
- You can use this user ID and password and log in or RDP to your windows machine
Tag:Google Cloud
