Install Active Directory Domain Services in Windows Server 2019
- Hit Windows key on your keyboard and type Server Manager to search for the application. Once it is open as illustrated by the figure below, let us now proceed to the next step of installing Active Directory Domain Services.
- Access the Manage menu and click on Add roles and features.

- Access the Server role screen, select the Active Directory Domain Service and click on the Next button.
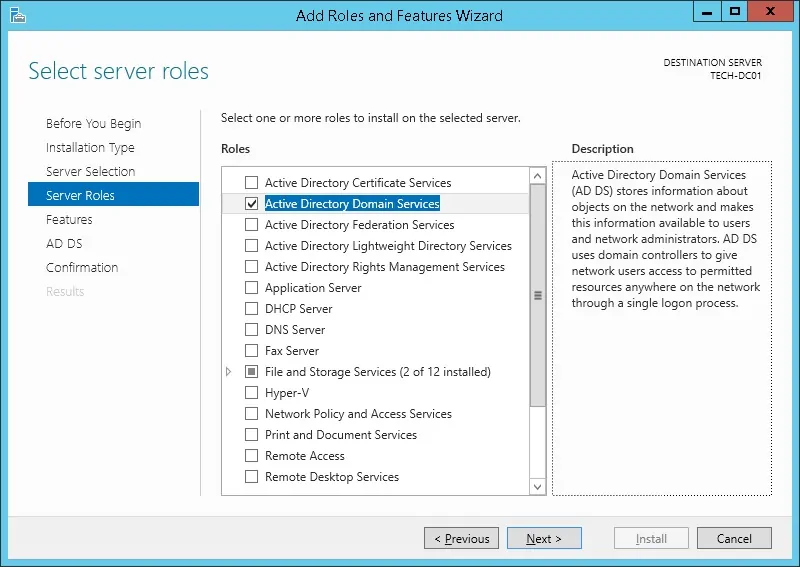
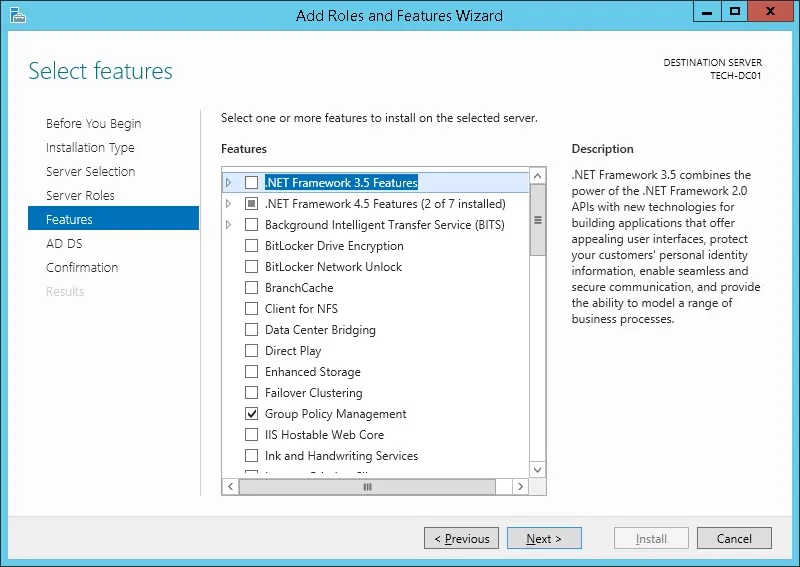
- On the following screen, click on the Add features button.
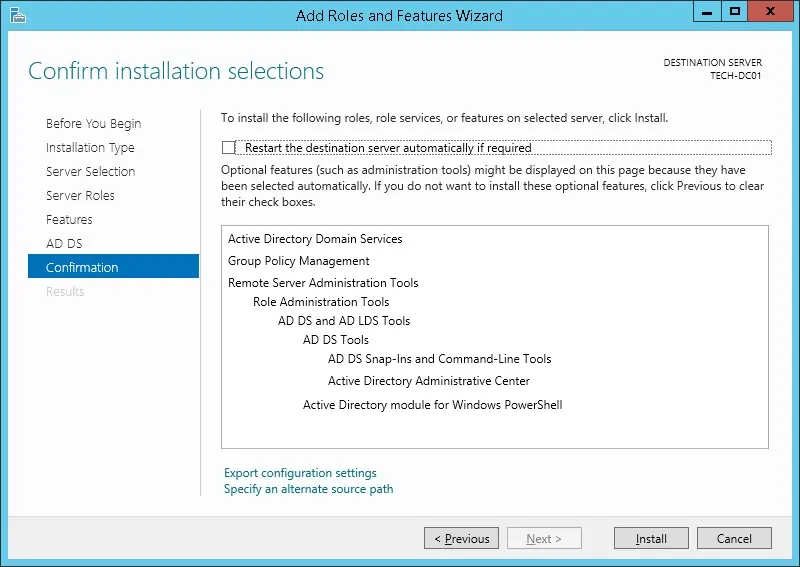
- On the confirmation screen, click on the Install button.
- Wait the Active directory installation to finish.
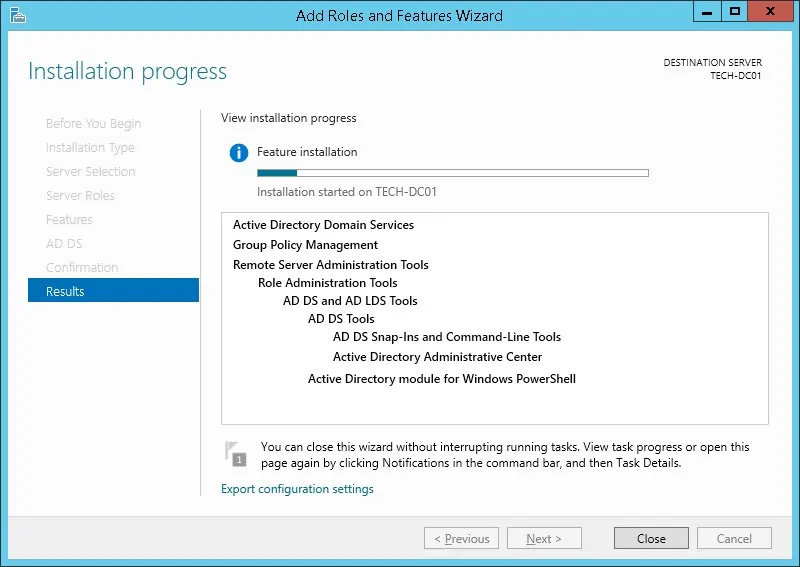
- You have finished the Active directory service installation on Windows .
- Click on the yellow flag menu and select the option to promote this server to a domain controller

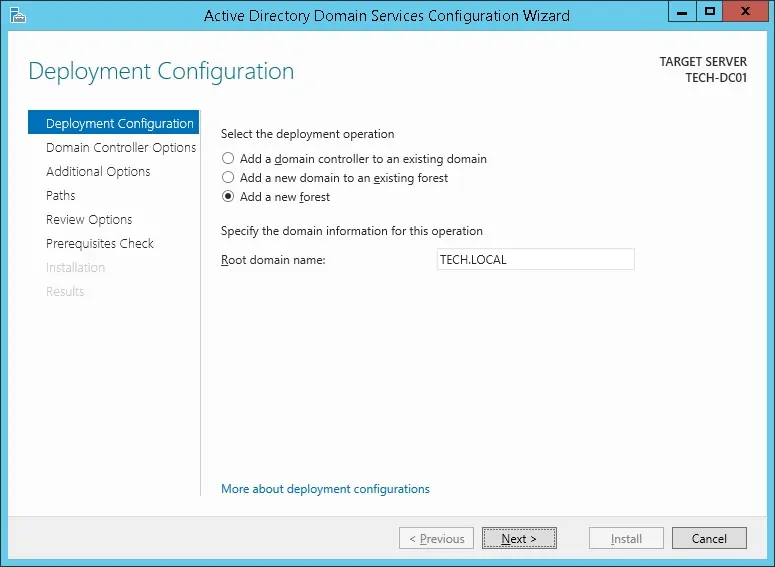
- Select the option to Add a new forest and enter a root domain name.
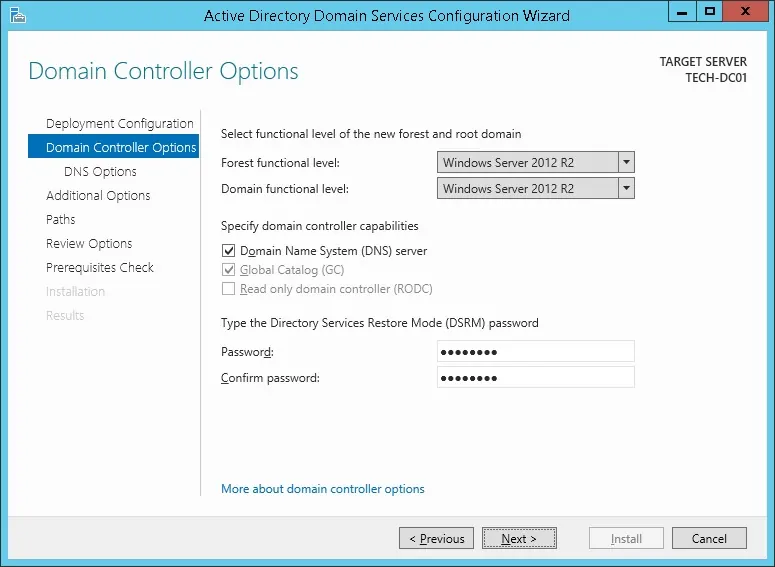
- Enter a password to allow the Active Directory restoration.
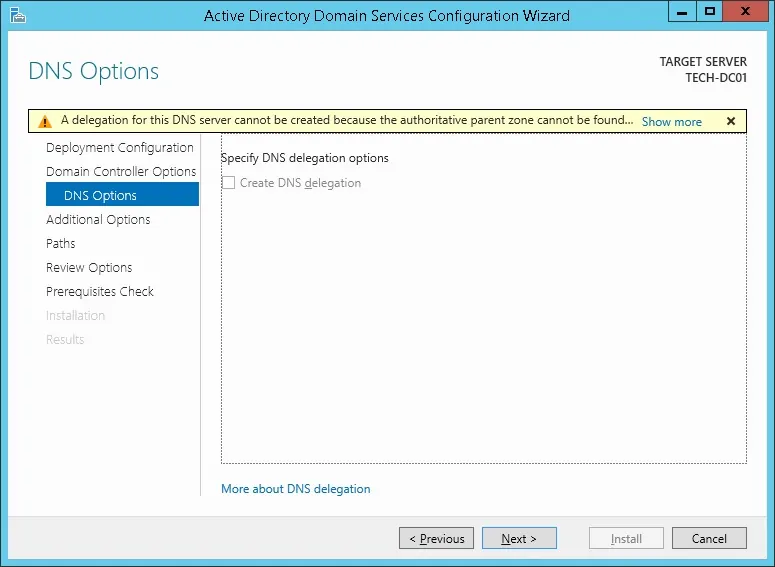
- On the DNS options screen, click on the Next button.
- Verify the Netbios name assigned to your domain and click on the Next button.

- Click on the Next button.
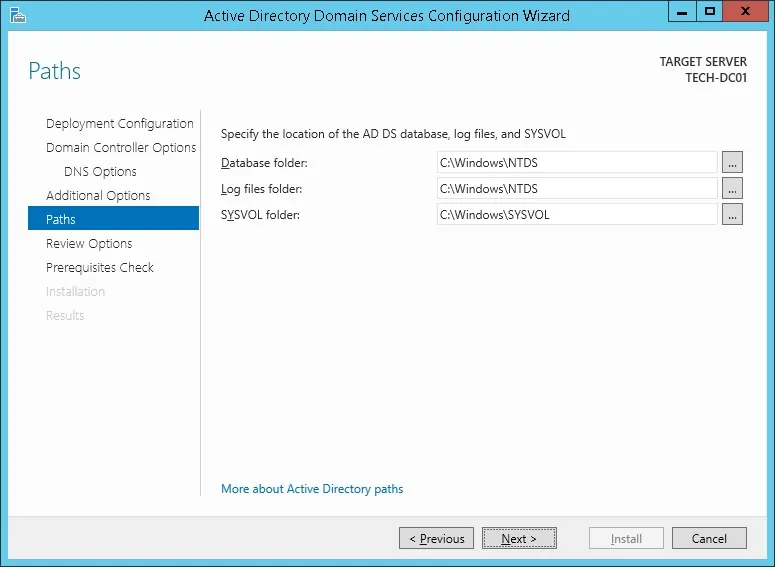
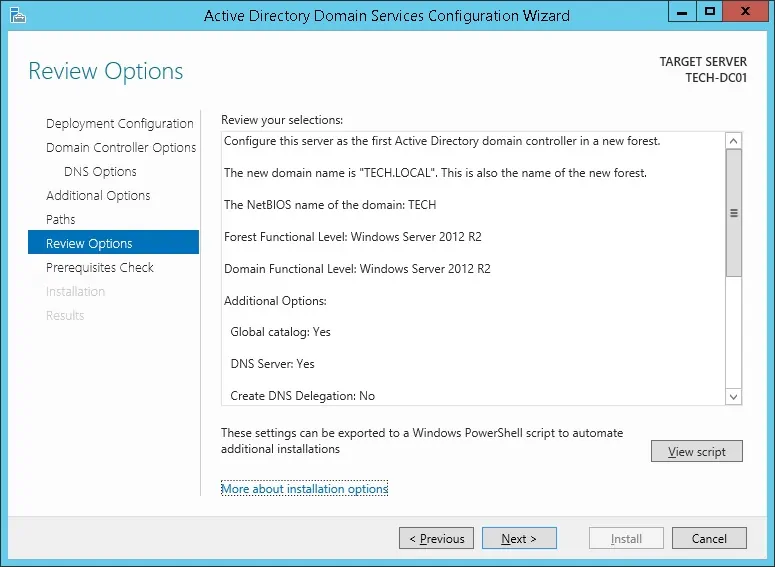
- Review your configuration options and click on the Next button.
- On the Prerequisites Check screen, click on the Install button.

- Wait the Active Directory Configuration to finish.
