Managing Azure Resource Group
Create resource groups
- Sign in to the Azure portal.
- Select Resource groups
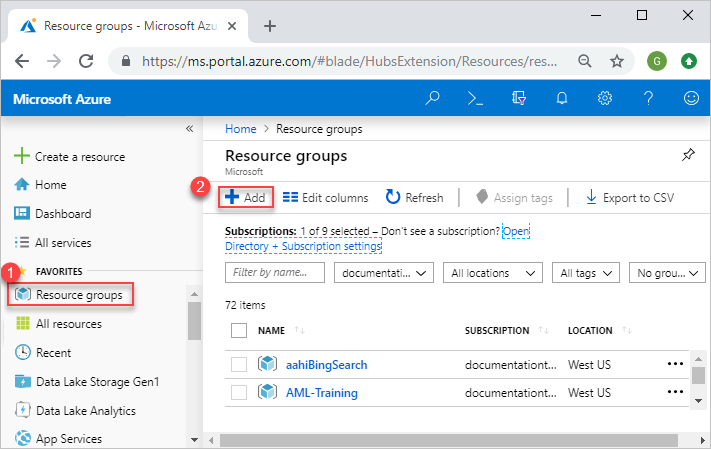
- Select Add.
- Enter the following values:
Subscription: Select your Azure subscription.
Resource group: Enter a new resource group name.
Region: Select an Azure location, such as Central US.
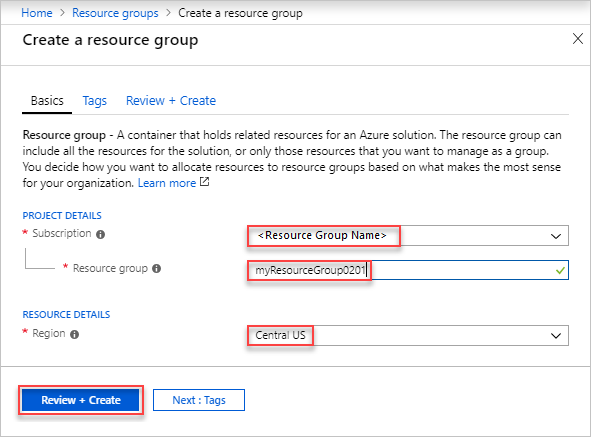
- Select Review + Create
- Select Create. It takes a few seconds to create a resource group.
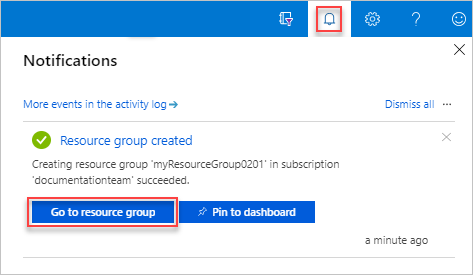
- Select Refresh from the top menu to refresh the resource group list, and then select the newly created resource group to open it. Or select Notification(the bell icon) from the top, and then select Go to resource group to open the newly created resource group
List resource groups
- Sign in to the Azure portal.
- To list the resource groups, select Resource groups
- To customize the information displayed for the resource groups, select Edit columns. The following screenshot shows the addition columns you could add to the display:
Delete resource groups
- Open the resource group you want to delete.
- Select Delete resource group.

Moving Resources between Resource Group
- Select the resources you want to move. To move all of the resources, select the checkbox at the top of list. Or, select resources individually.
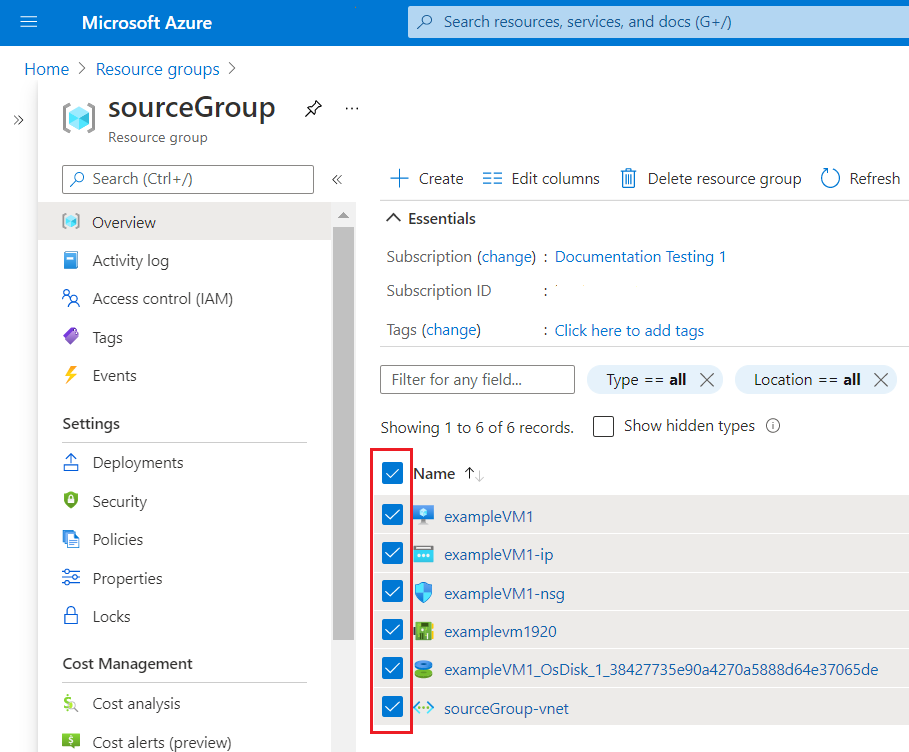
- Select the Move button.
- Select whether you’re moving the resources to a new resource group or a new subscription.
- The source resource group is automatically set. Specify the destination resource group. If you’re moving to a new subscription, also specify the subscription. Select Next.
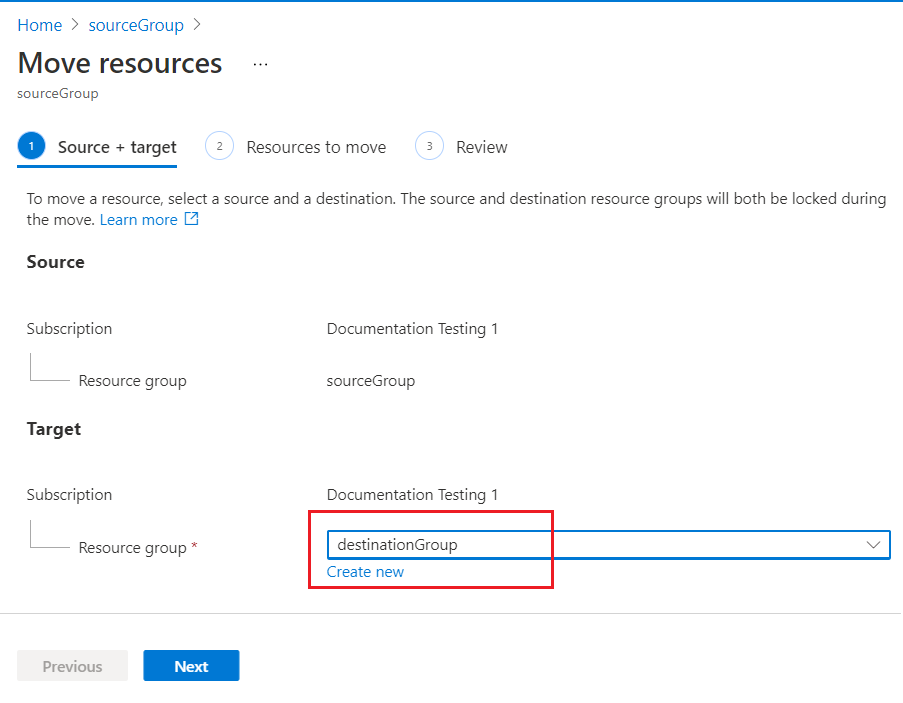
- The portal validates that the resources can be moved. Wait for validation to complete.
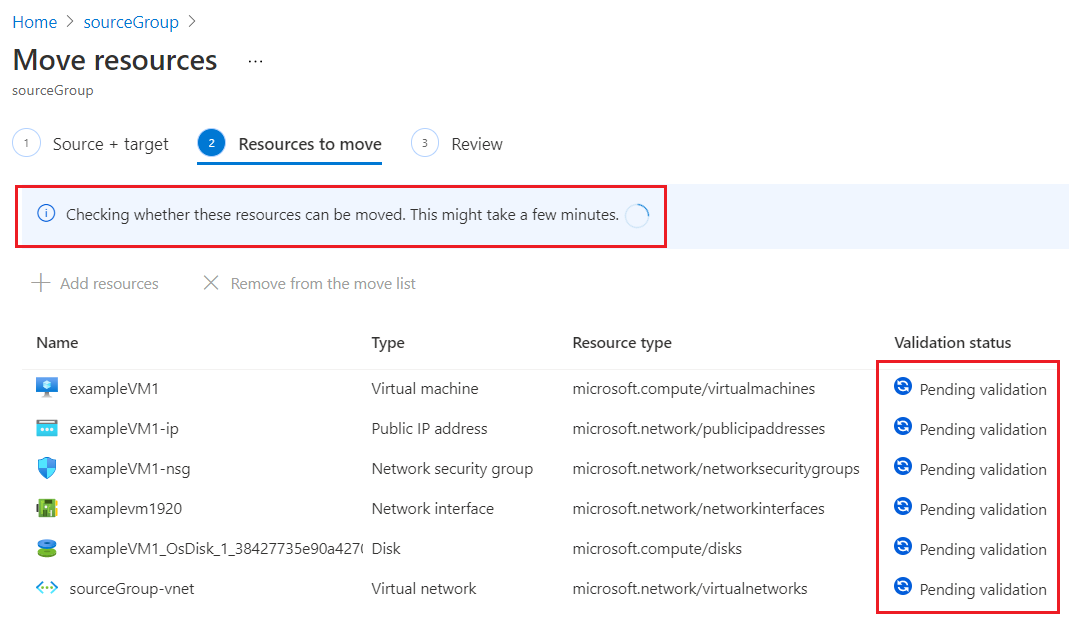 When validation completes successfully, select Next.
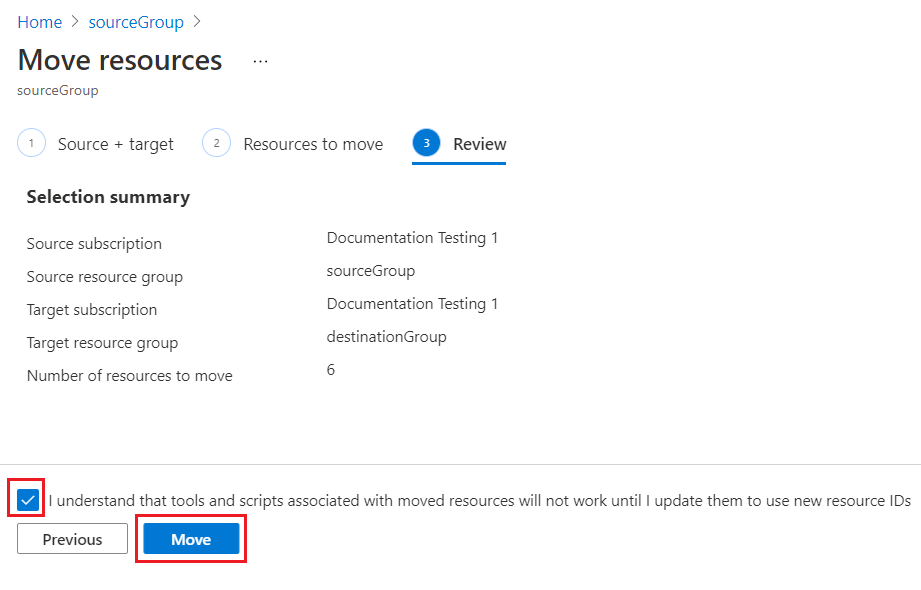
 - Acknowledge that you need to update tools and scripts for these resources. To start moving the resources, select Move.
Tag:Azure
