Add your custom domain name using the Azure Active Directory
- Sign in to the Azure portal using a Global administrator account for the directory.
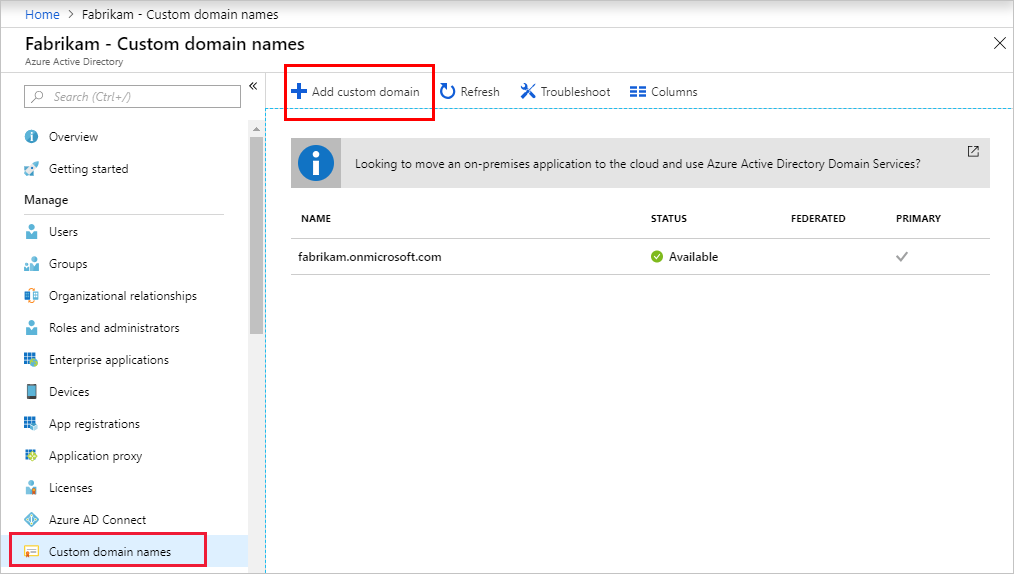
- Search for and select Azure Active Directory from any page. Then select Custom domain names > Add custom domain

- In Custom domain name, enter your organization’s new name, in this example, contoso.com. Select Add domain.
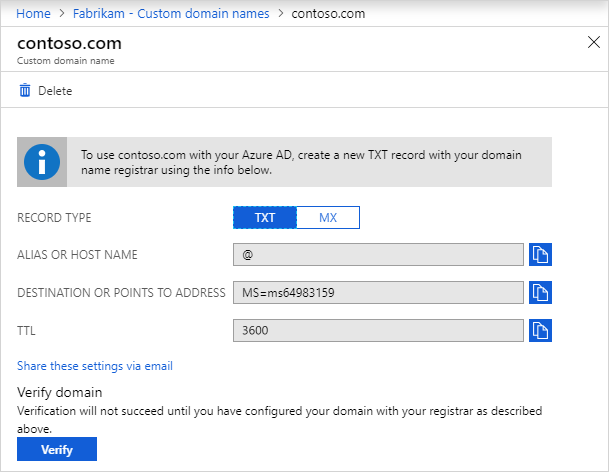
- The unverified domain is added. The contoso.com page appears showing your DNS information. Save this information. You need it later to create a TXT record to configure DNS.

- After you add your custom domain name to Azure AD, you must return to your domain registrar and add the Azure AD DNS information from your copied TXT file. Creating this TXT record for your domain verifies ownership of your domain name. Go back to your domain registrar and create a new TXT record for your domain based on your copied DNS information. Set the time to live (TTL) to 3600 seconds (60 minutes), and then save the record.
- In Custom domain names, select the custom domain name. In this example, select contoso.com.
- On the contoso.com page, select Verify to make sure your custom domain is properly registered and is valid for Azure AD.
- Once the domain is registered and verified, make it your primary domain
Tag:Azure
