Back up a virtual machine in Azure
Create a Recovery Services vault
- Sign in to your subscription in the Azure portal.
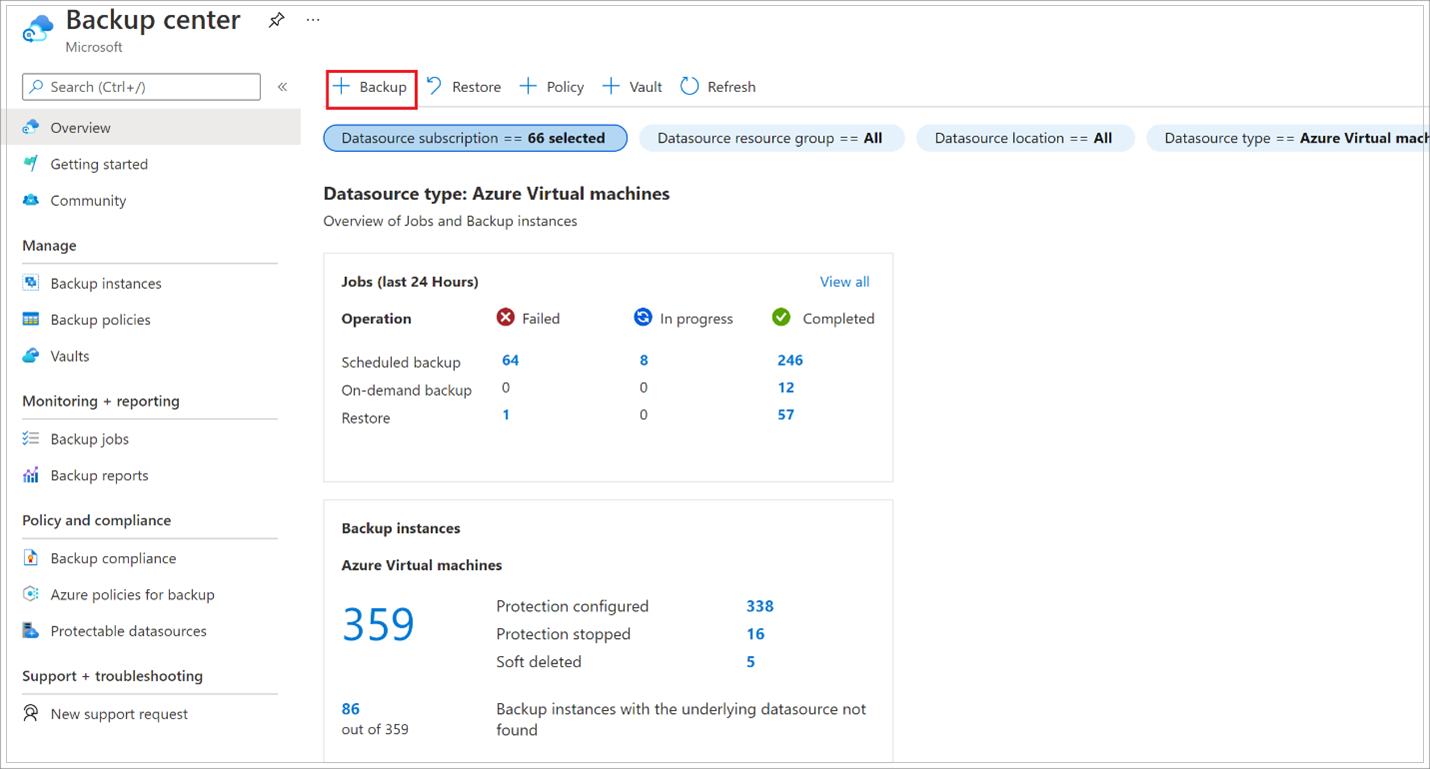
- Search for Backup center in the Azure portal, and go to the Backup Center dashboard.

- Select +Vault from the Overview tab.

- Select Recovery Services vault > Continue.
- The Recovery Services vault dialog opens. Provide the following values:

- After you provide the values, select Review + create.
- When you’re ready to create the Recovery Services vault, select Create.
Apply a backup policy
- Go to Backup center and click +Backup from the Overview tab.

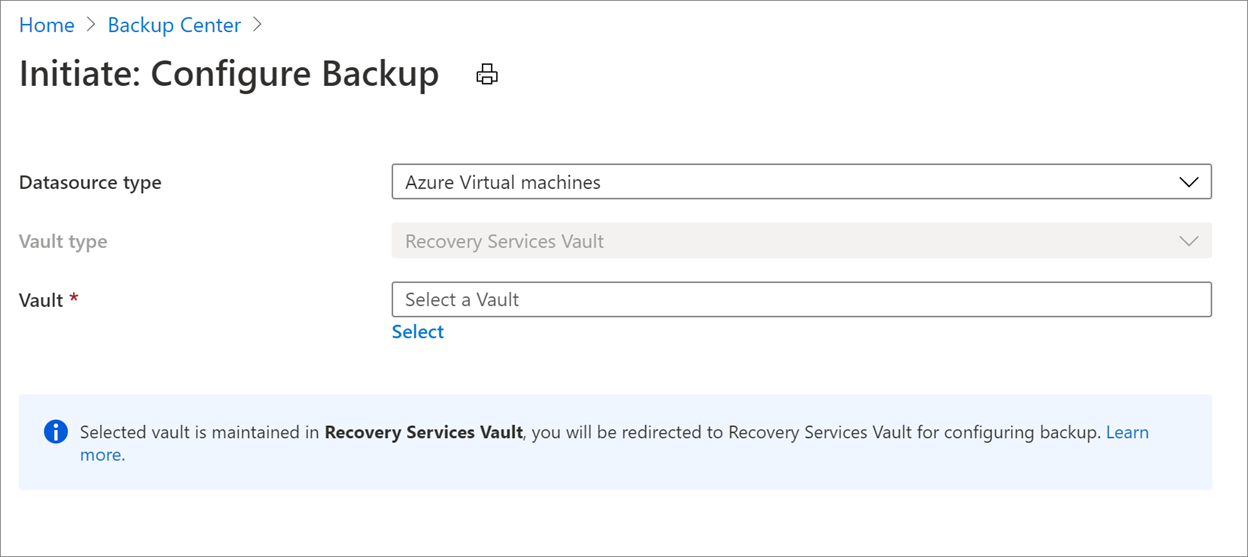
- Select Azure Virtual machines as the Datasource type and select the vault you have created. Then click Continue.

- Assign a Backup policy.

- Under Virtual Machines, select Add.
- The Select virtual machines pane will open. Select the VMs you want to back up using the policy. Then select OK.
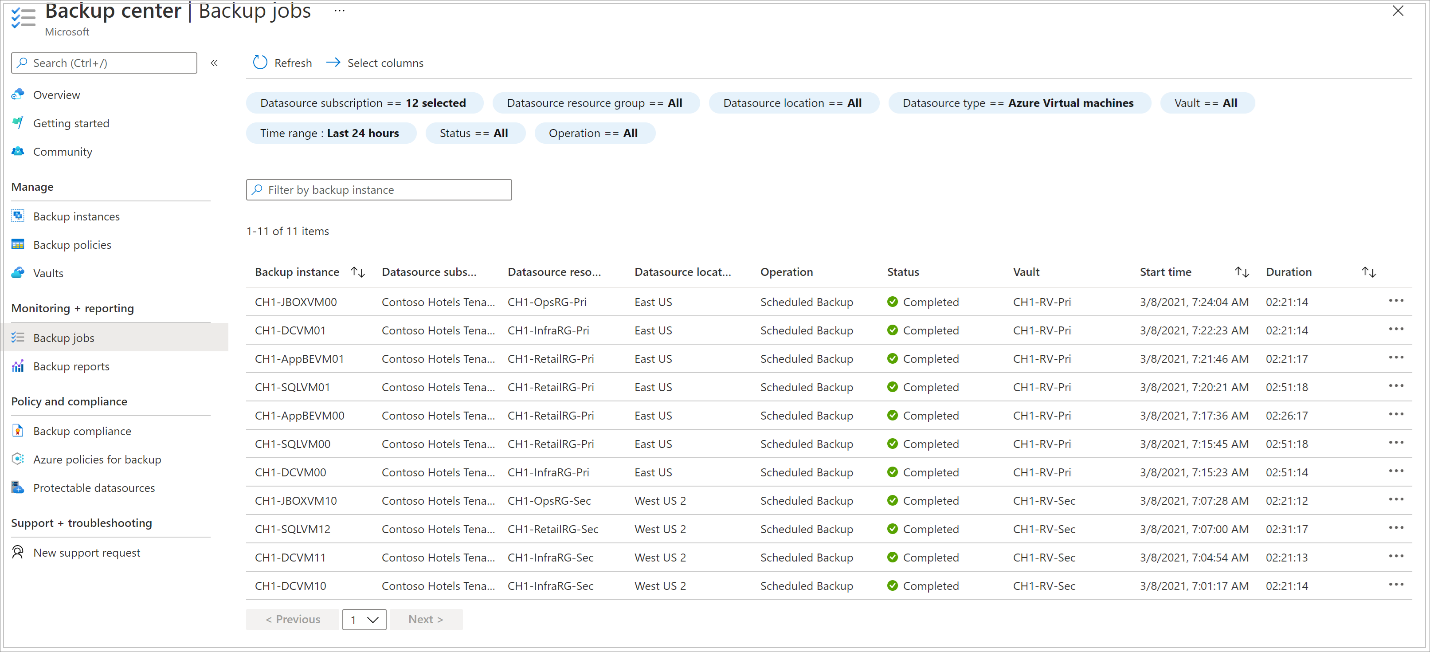
Monitor the backup job
The Backup job details for each VM backup consist of two phases, the Snapshot phase followed by the Transfer data to vault phase.
The snapshot phase guarantees the availability of a recovery point stored along with the disks for Instant Restores and are available for a maximum of five days depending on the snapshot retention configured by the user. Transfer data to vault creates a recovery point in the vault for long-term retention. Transfer data to vault only starts after the snapshot phase is completed.

Tag:Azure
