Create a basic group and add members using Azure Active Directory
- Sign in to the Azure portal using a Global administrator account for the directory.
- Search for and select Azure Active Directory.
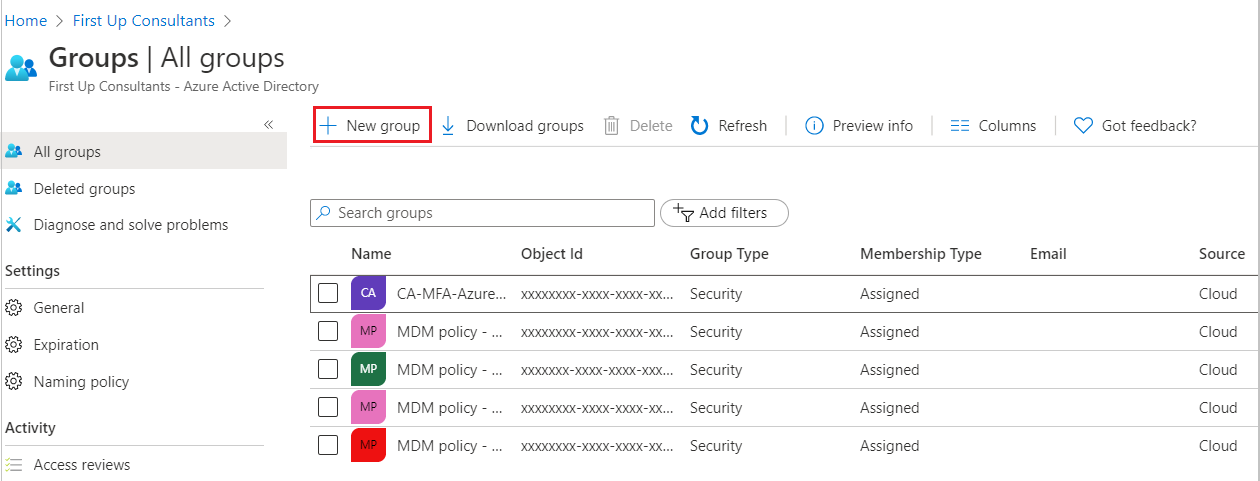
- On the Active Directory page, select Groups and then select New group.

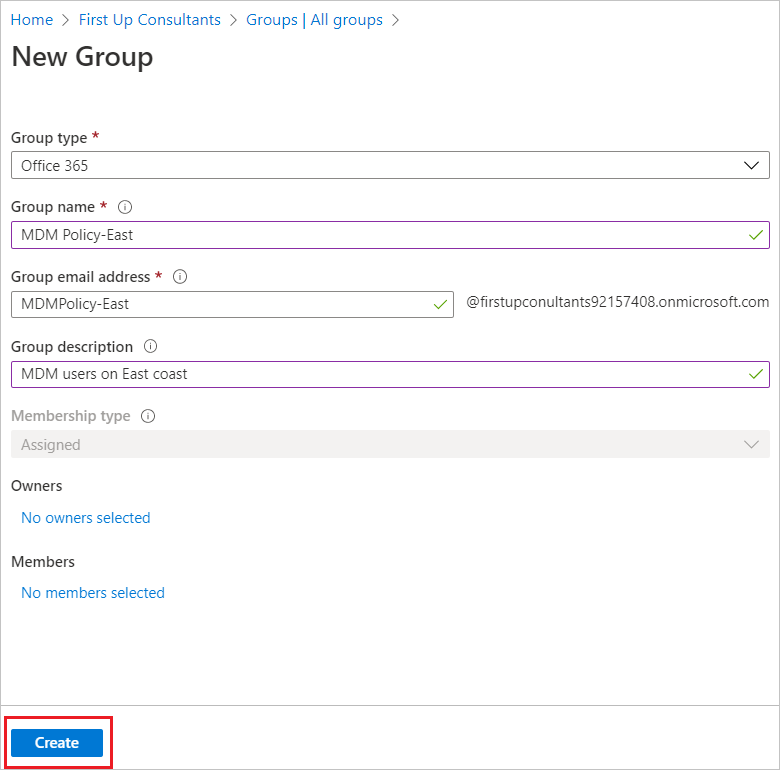
- The New Group pane will appear and you must fill out the required information.

- Select a pre-defined Group type.
- Create and add a Group name. Choose a name that you’ll remember and that makes sense for the group. A check will be performed to determine if the name is already in use by another group. If the name is already in use, to avoid duplicate naming, you’ll be asked to change the name of your group.
- Add a Group email address for the group, or keep the email address that is filled in automatically.
- Group description. Add an optional description to your group.
- Select a pre-defined Membership type (required).
- Select Create. Your group is created and ready for you to add members.
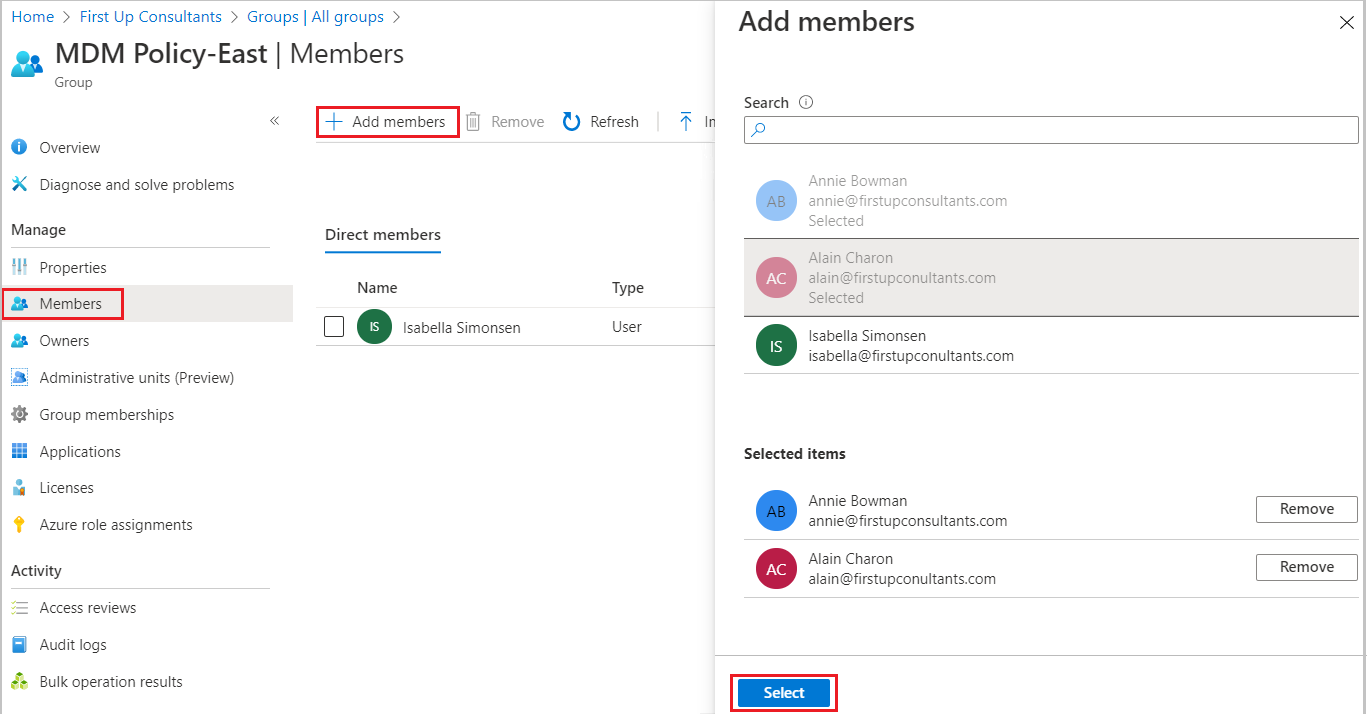
- Select the Members area from the Group page, and then begin searching for the members to add to your group from the Select members page.

- When you’re done adding members, choose Select.
Tag:Azure
