Create a virtual network using the Azure portal
- Select Create a resource in the upper left-hand corner of the portal.
- In the search box, enter Virtual Network. Select Virtual Network in the search results.
- In the Virtual Network page, select Create.
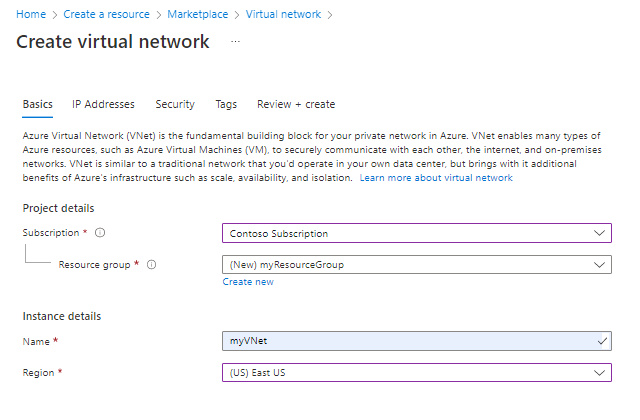
- In Create virtual network, enter or select this information in the Basics tab

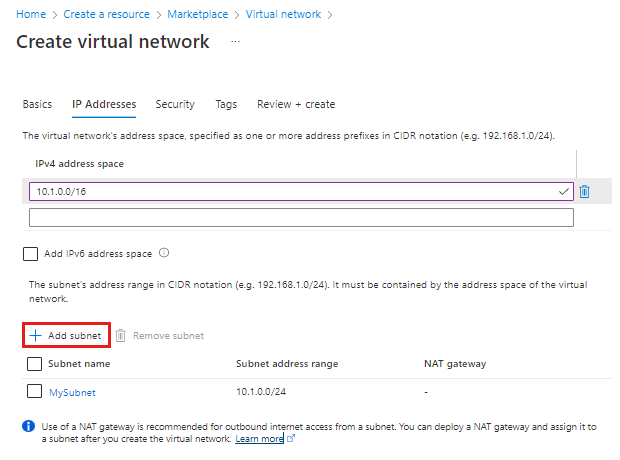
- Select the IP Addresses tab, or select the Next: IP Addresses button at the bottom of the page and enter in the following information then select Add:

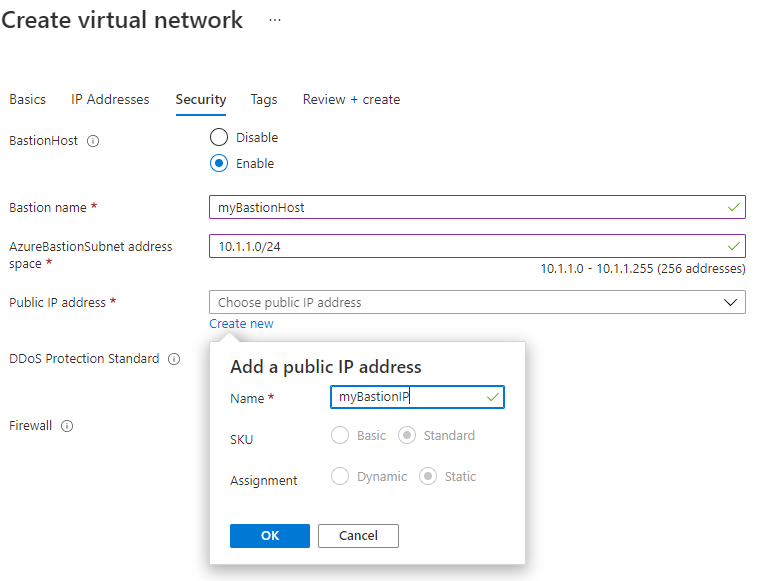
- Select the Security tab, or select the Next: Security button at the bottom of the page.
- Under BastionHost, select Enable. Enter this information:

- Select the Review + create tab or select the Review + create button.
- Select Create.
- Lets, create a VM in this VNet now.
- On the upper-left side of the portal, select Create a resource > Compute > Virtual machine.
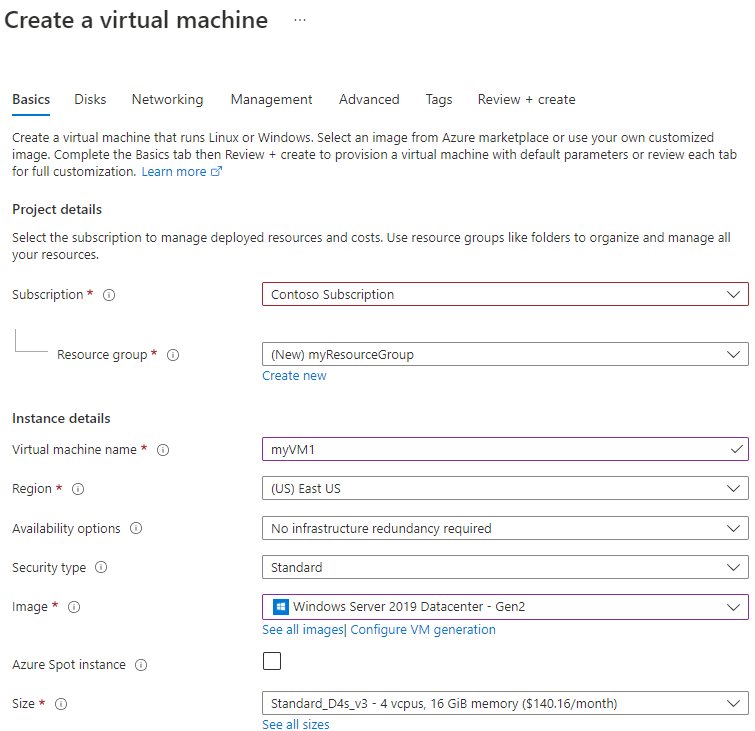
- In Create a virtual machine, type or select the values in the Basics tab:

- Select the Networking tab, or select Next: Disks, then Next: Networking.
- In the Networking tab, select or enter:
- Virtual network: Select myVNet.
- Subnet: Select mySubnet
- Public IP: Select None
- NIC network security group: Select Basic
- Public inbound ports network: Select None.
- Select the Review + create tab, or select the blue Review + create button at the bottom of the page.
- Review the settings, and then select Create.
- Creating one more VM.
- On the upper-left side of the portal, select Create a resource > Compute > Virtual machine.
- In Create a virtual machine, type or select the values in the Basics tab:

- Select the Networking tab, or select Next: Disks, then Next: Networking.
- In the Networking tab, select or enter:
- Virtual network: Select myVNet.
- Subnet: Select mySubnet
- Public IP: Select None
- NIC network security group: Select Basic
- Public inbound ports network: Select None.
- Select the Review + create tab, or select the blue Review + create button at the bottom of the page.
- Review the settings, and then select Create.
- Go to the Azure portal to manage your private VM. Search for and select Virtual machines.
- Pick the name of your private virtual machine myVM1.
- In the VM menu bar, select Connect, then select Bastion.
- In the Connect page, select the blue Use Bastion button.
- In the Bastion page, enter the username and password you created for the virtual machine previously.
- Select Connect.
- In the Bastion connection of myVM1, open PowerShell.
- Enter
ping myVM2. - The ping fails, because it uses the Internet Control Message Protocol (ICMP). By default, ICMP isn’t allowed through your Windows firewall.
- To allow myVM2 to ping myVM1 in a later step, enter this command:
New-NetFirewallRule –DisplayName "Allow ICMPv4-In" –Protocol ICMPv4
- Close the bastion connection to myVM1.
- Complete the steps in Connect to myVM1, but connect to myVM2.
- Open PowerShell on myVM2, enter
ping myvm1. - Close the bastion connection to myVM2.
Tag:Azure
