Create an Azure Cosmos account, database, container, and items from the Azure portal
Create an Azure Cosmos DB account
- From the Azure portal menu or the Home page, select Create a resource.
- On the New page, search for and select Azure Cosmos DB.
- On the Select API option page, select the Create option within the Core (SQL) – Recommend section. Azure Cosmos DB provides five APIs: Core (SQL) and MongoDB for document data, Gremlin for graph data, Azure Table, and Cassandra. Currently, you must create a separate account for each API.
- In the Create Azure Cosmos DB Account page, enter the basic settings for the new Azure Cosmos account.
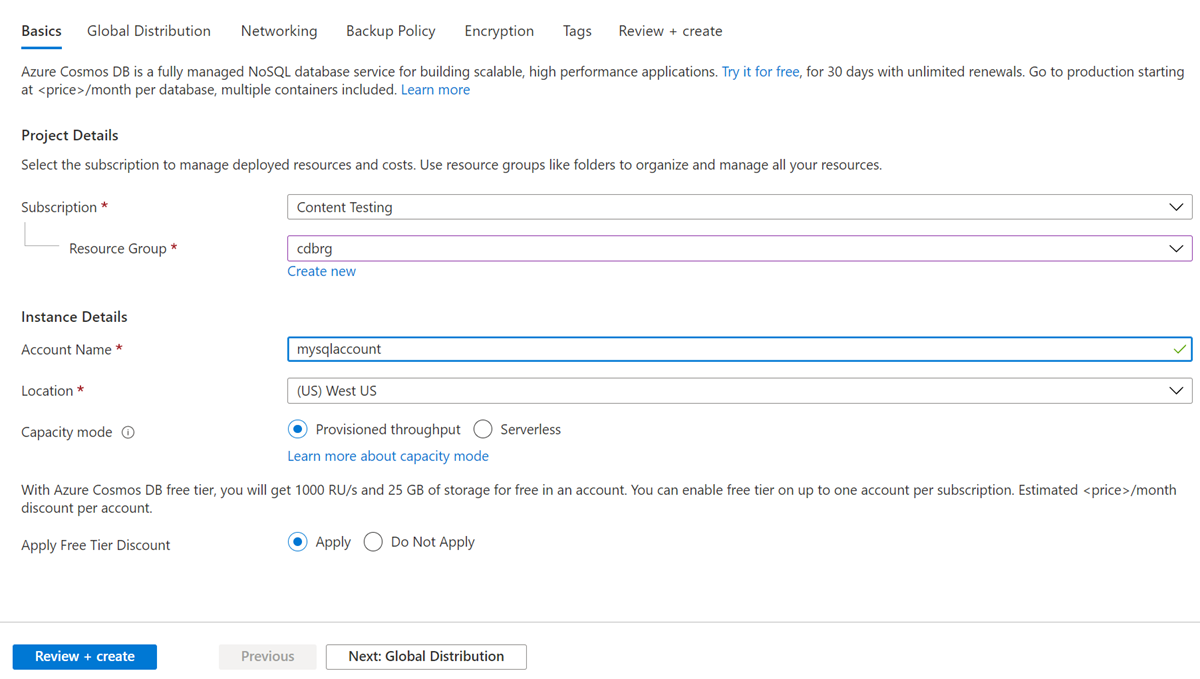
- In the Global Distribution tab, configure the following details. You can leave the default values for this quickstart
- Optionally you can configure more details in the following tabs:
- Networking – Configure access from a virtual network.
- Backup Policy – Configure either periodic or continuous backup policy.
- Encryption – Use either service-managed key or a customer-managed key.
- Tags – Tags are name/value pairs that enable you to categorize resources and view consolidated billing by applying the same tag to multiple resources and resource groups.
- Select Review + create.
- Review the account settings, and then select Create. It takes a few minutes to create the account. Wait for the portal page to display Your deployment is complete.
- Select Go to resource to go to the Azure Cosmos DB account page.
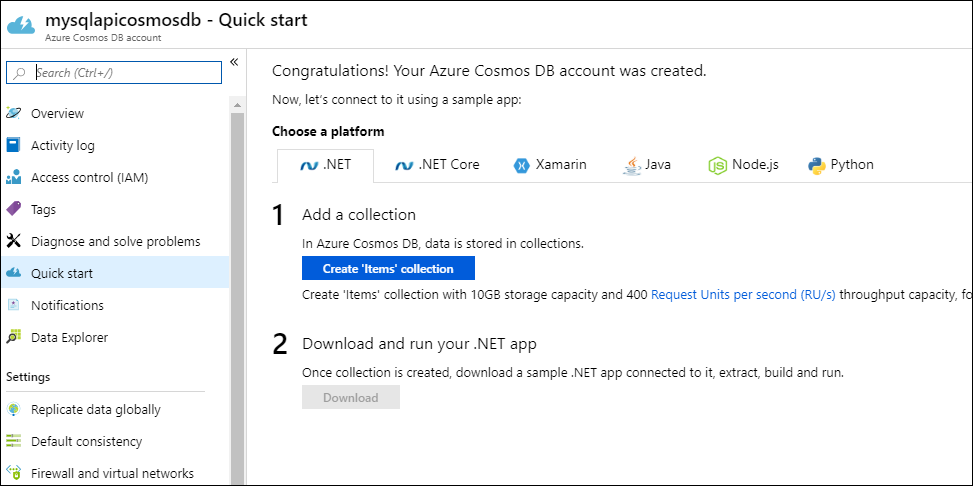
Add a database and a container
- Select Data Explorer from the left navigation on your Azure Cosmos DB account page, and then select New Container.
- You may need to scroll right to see the Add Container window.
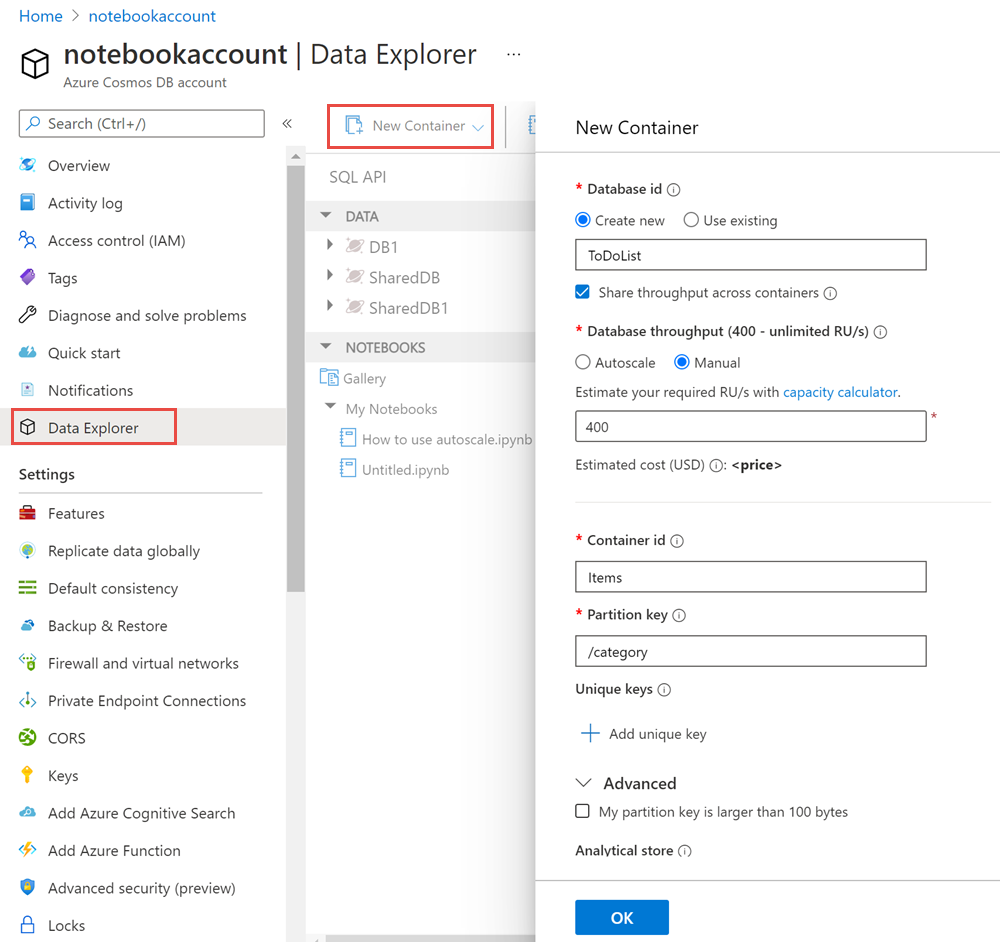
- In the Add container pane, enter the settings for the new container.
Database ID: ToDoList
Database throughput: Manual throughput
Container ID: Items
Partition key: /category - Select OK. The Data Explorer displays the new database and the container that you created.
Add data to your database
- In Data Explorer, expand the ToDoList database, and expand the Items container. Next, select Items, and then select New Item.
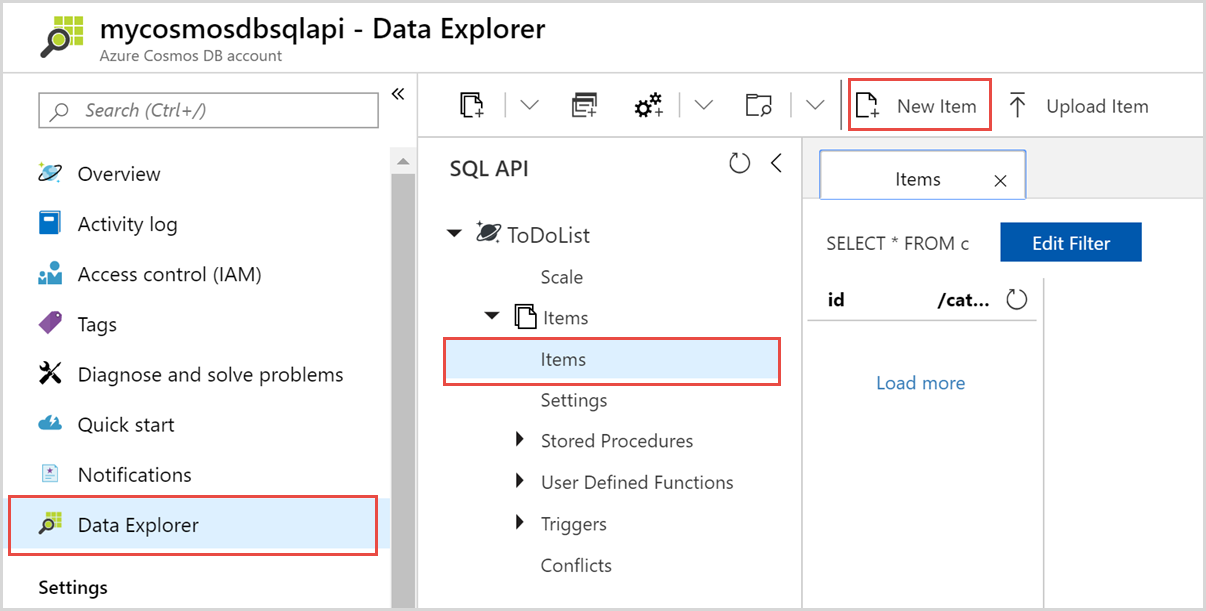
- Add the following structure to the document on the right side of the Documents pane:
{ "id": "1", "category": "personal", "name": "groceries", "description": "Pick up apples and strawberries.", "isComplete": false } - Select Save.
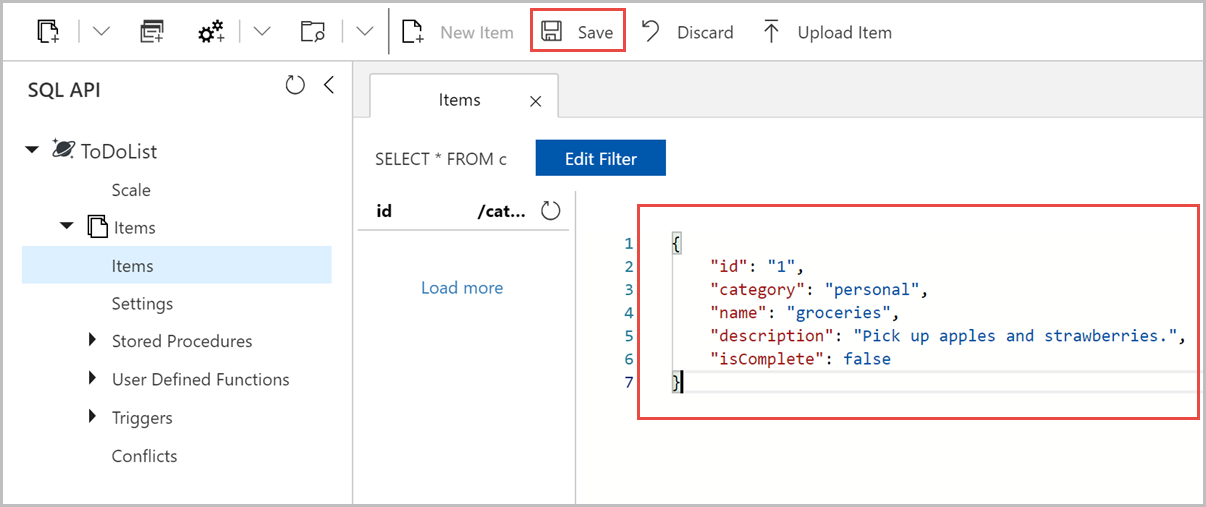
- Select New Item again, and create and save another document with a unique
id, and any other properties and values you want. Your documents can have any structure, because Azure Cosmos DB doesn’t impose any schema on your data.
Query your data
- At the top of the Items tab in Data Explorer, review the default query
SELECT * FROM c. This query retrieves and displays all documents from the container ordered by ID.
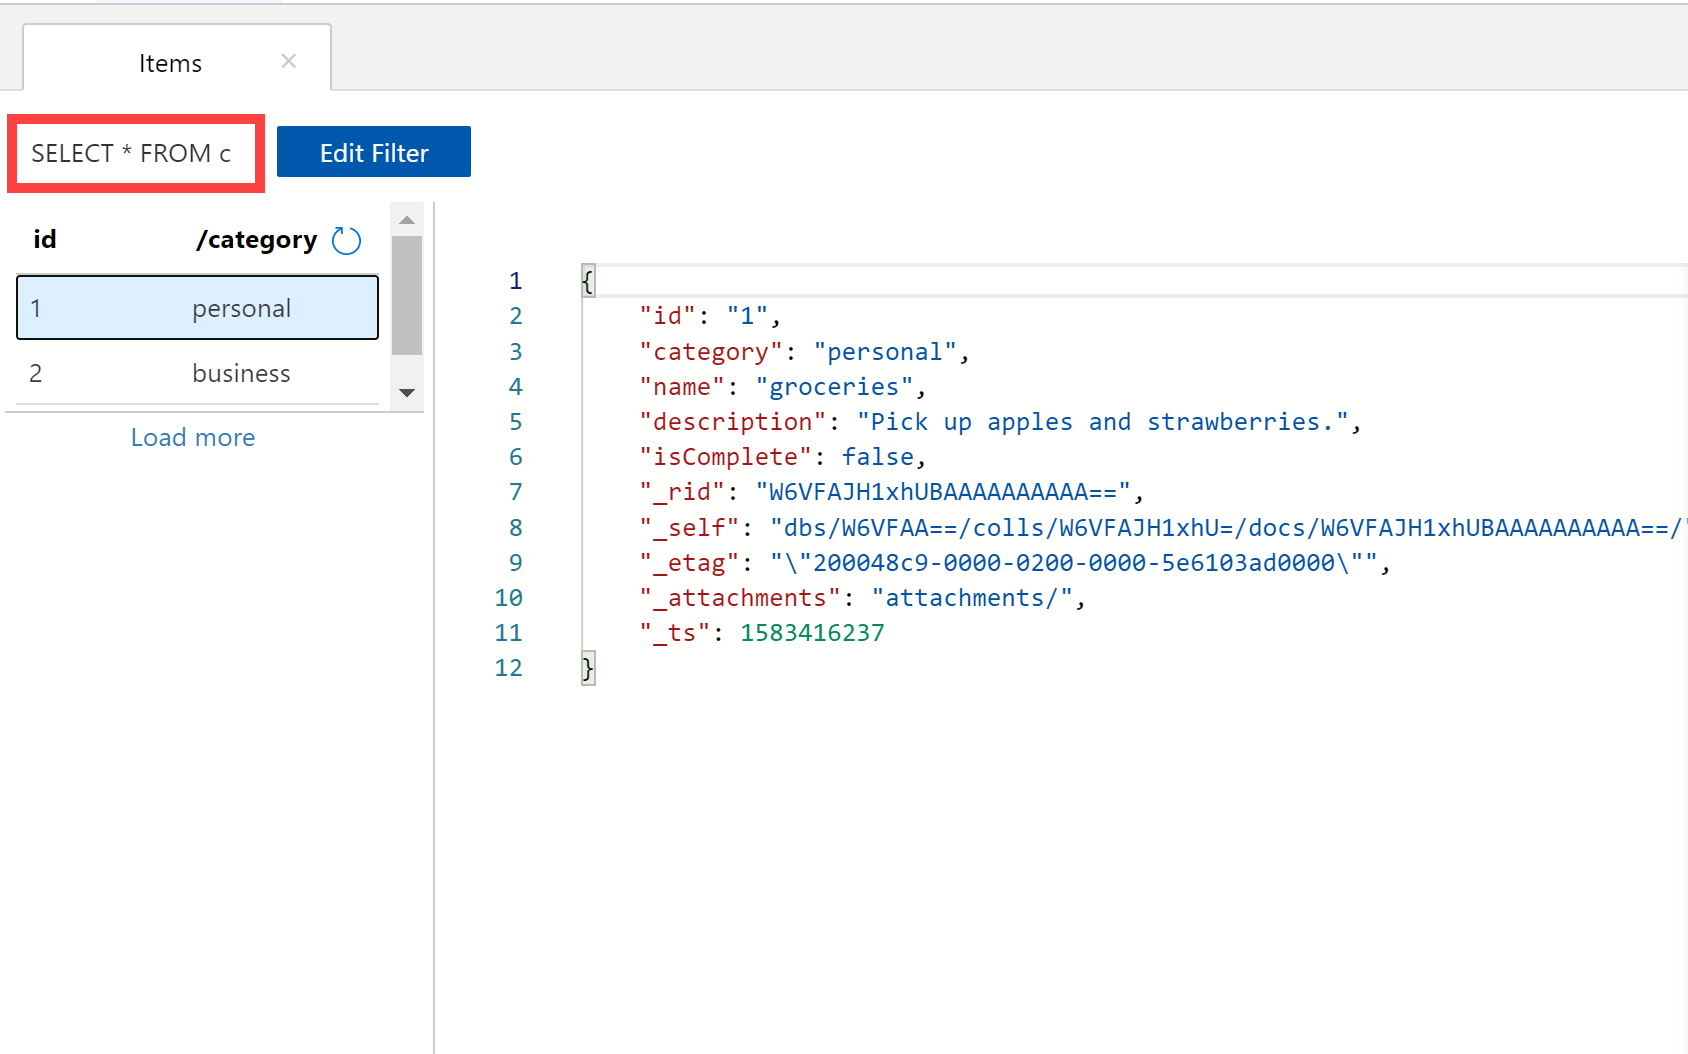
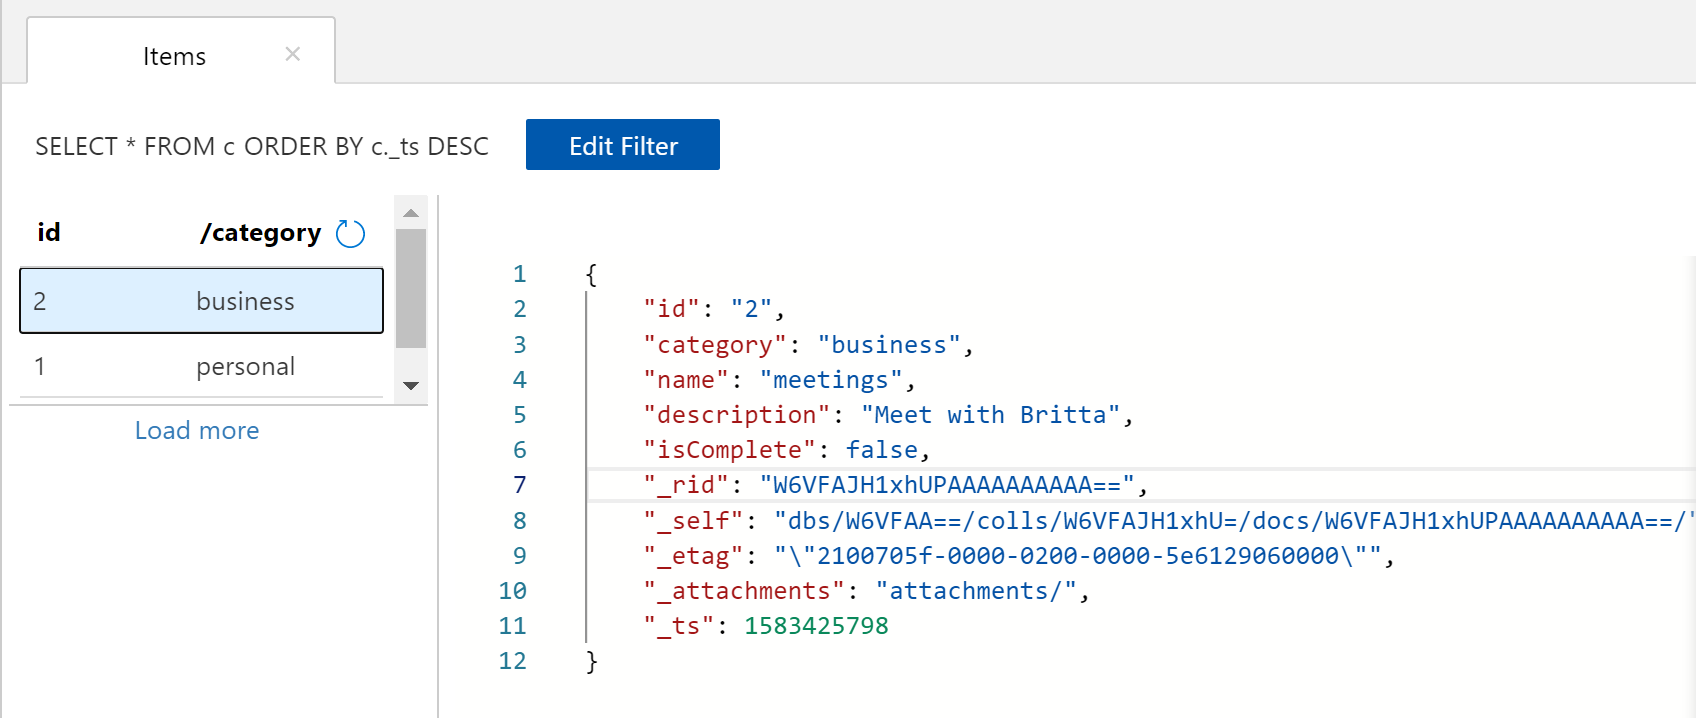
- To change the query, select Edit Filter, replace the default query with
ORDER BY c._ts DESC, and then select Apply Filter.

The modified query displays the documents in descending order based on their time stamp, so now your second document is listed first.
Tag:Azure
