Creating an Image of Compute Engine Instance
- Go to the compute engine service page and then click on Create Instance
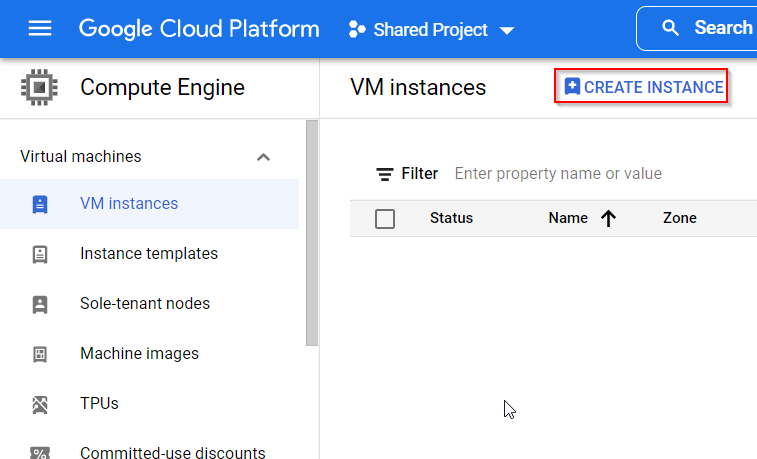
- Now on the create instance page you can fill in a lot of details about your instance so let’s start
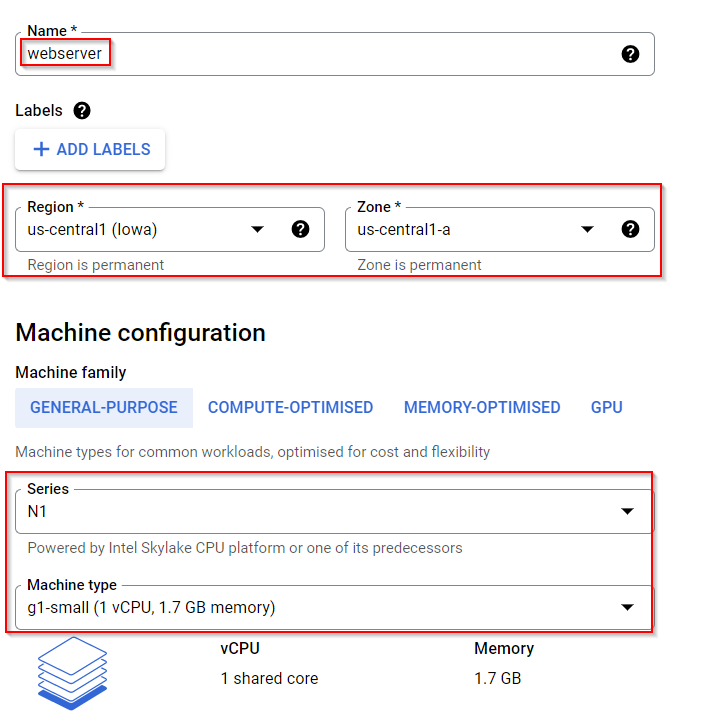
Name: Here you can enter the name of the instance, for example enter the name of the instance as webserver
Label: Here you can add labels to the instance so labels are key-value pair, for example environment: prod
Then you can select the Machine Family for your instance
For the purpose of this demo you will select the Machine series as N1 and machine type as g1-small
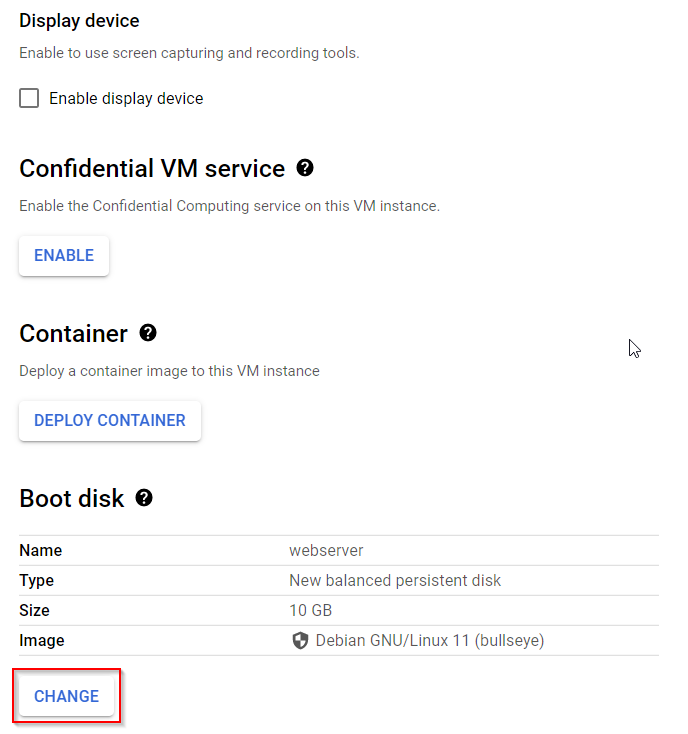
- In this section you would be changing the boot disk
Boot disk is nothing but the operating system disk so whenever you change the boot disk you are ultimately changing the operating system image
So here you will click on Change
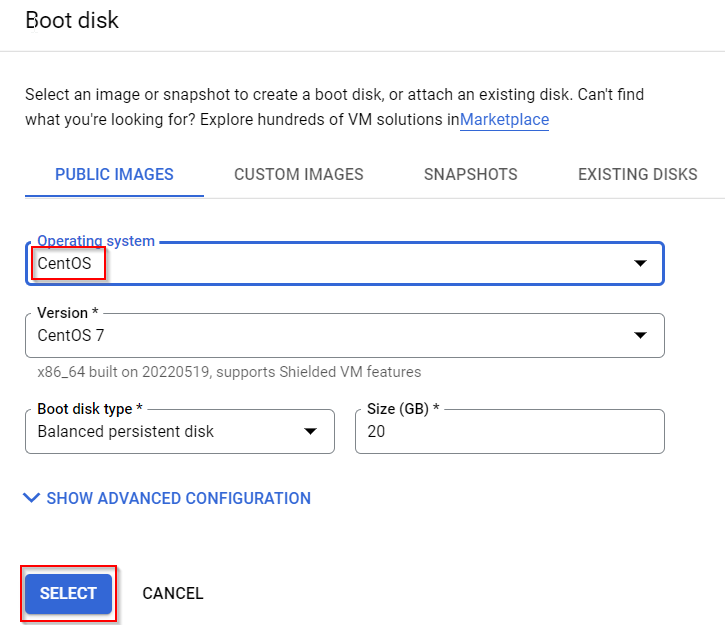
- And you be selecting the operating system is CentOS then you will click on Select
- In this section you can change the default service account with the service account which you will create in identity and access management service
You can also define the network tags so you will select allow HTTP traffic & HTTPS traffic, this will basically add the HTTP and HTTPS network tag to your instance
Now finally you will click on the Create button
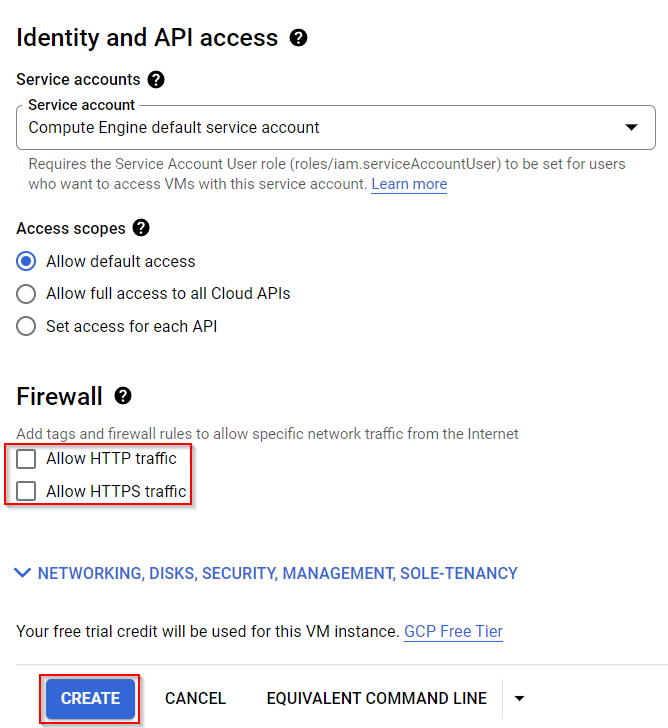
- Once the instance is created you would be able to see the instance in the dashboard

- You can click on the SSH button and that will open the SSH browser based window where you can clean your Linux command on your compute engine instance
- Now since we are connected to the SSH console of our compute engine instance
So we let you install an Apache web server, you can run below commands#this command basically elevates your privileges as a superuser in Linux sudo su #this command updates your Linux operating system and the packages installed yum update -y #this command will install Apache web server yum install httpd -y #this command will start Apache web server service httpd start #this command will make sure whenever you restart your Linux machine Apache web server is restarted automatically chkconfig httpd on #this command creates a index dot HTML web page with the Webmagic informatica as the content inside Apache web server public directory echo "WebMagic Informatica" > /var/www/html/index.html
- Now once everything is created you will need to stop the web server before you can create a new image
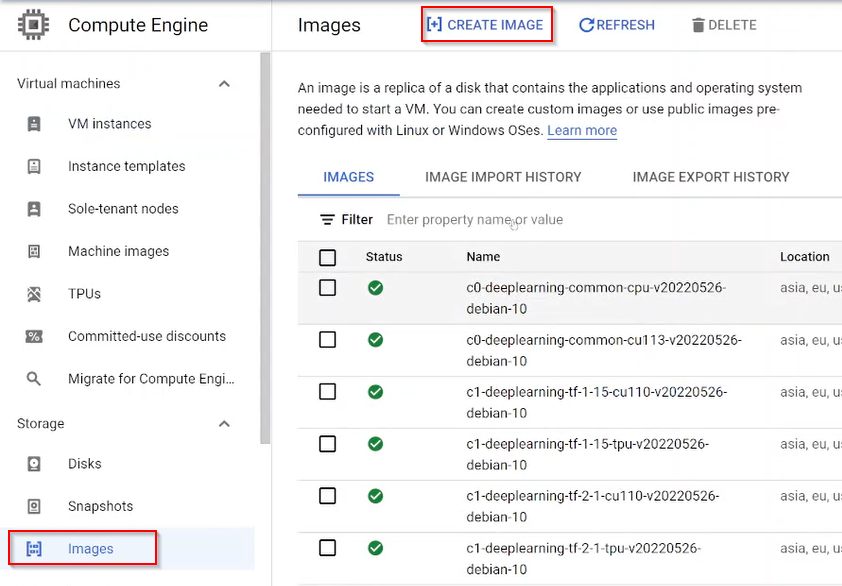
- Now from your compute engine dashboard, go to Images and click on Create Image
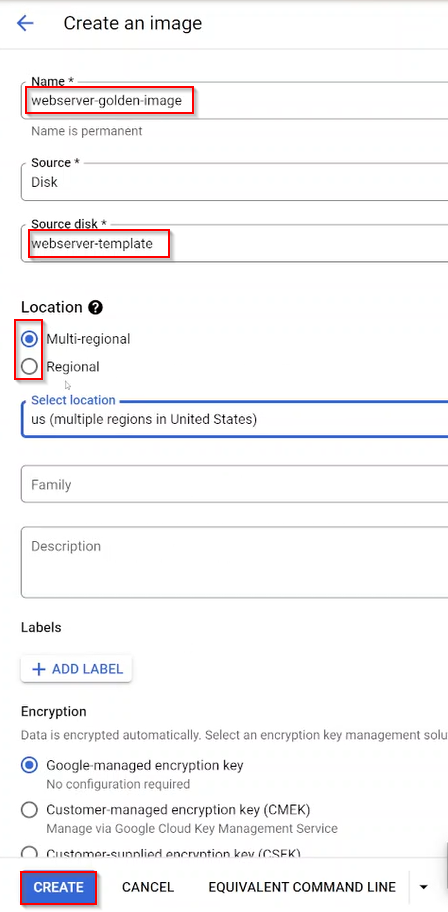
- Now inside image dialog box you would need to enter the Name of the image and you will need to select a source disk which would be virtual machine or the web server disk which you have created.
You can also choose the image location, it would be multiregional which means the image replica would be present in different regions within US or whichever multi-region you select or it could be regional which means it would be available only in one region
Now click on Create
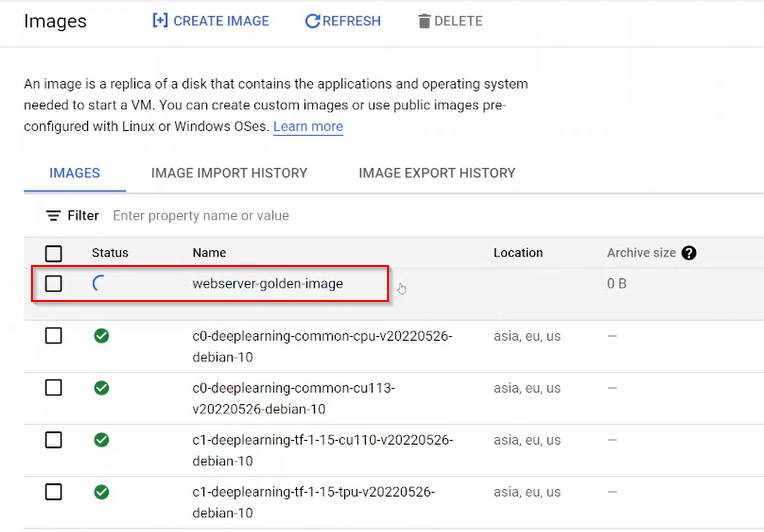
- Now you can see image getting created
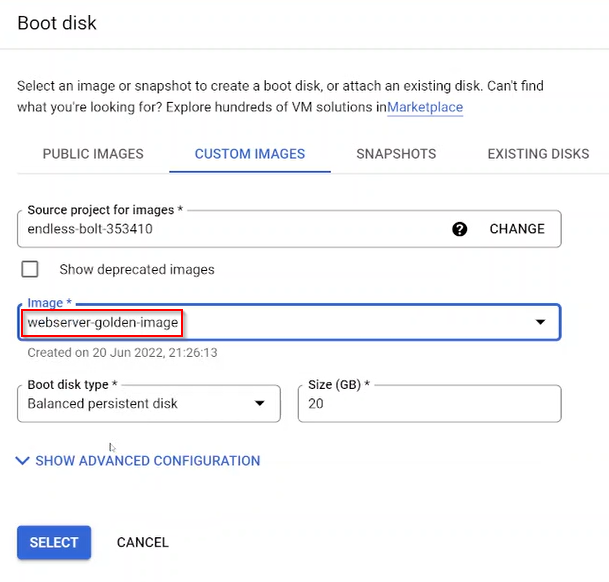
- Now while creating virtual machine if you select boot disk and if you go to custom images you will have an option to select the image which you created as part of this lab
- Do not delete this image because you would be needing this image for the next labs
Tag:Google Cloud
