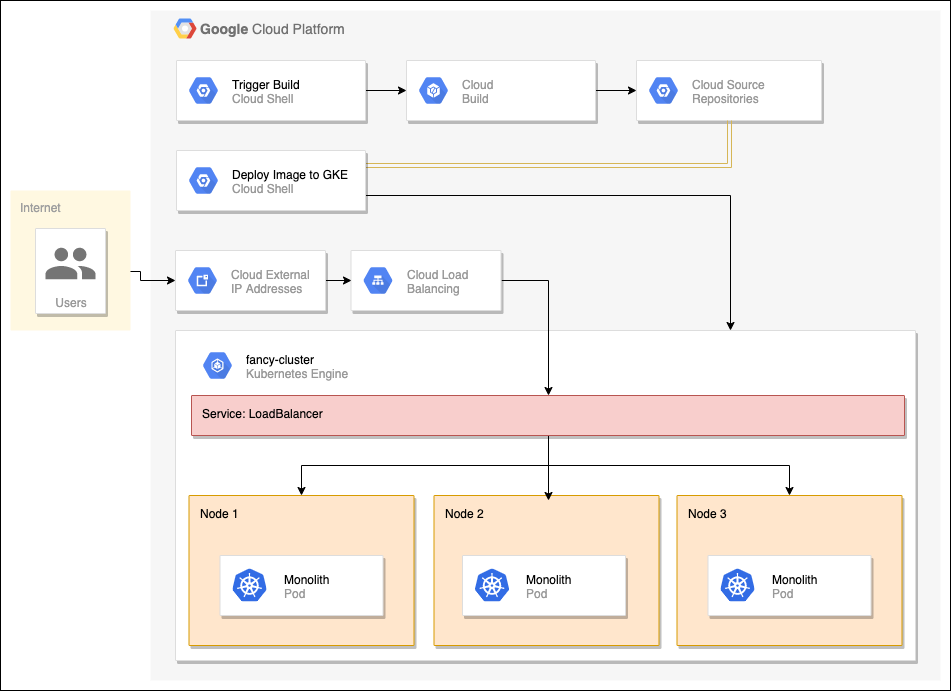
Deploy, Scale, and Update Your Website on Google Kubernetes Engine

- Click Activate Cloud Shell at the top of the Google Cloud console.
- Set the default zone and project configuration:
gcloud config set compute/zone us-central1-f
Create a GKE cluster
- Run the following command to enable the Container Registry API:
gcloud services enable container.googleapis.com
- Run the following to create a GKE cluster named
fancy-clusterwith 3 nodes:gcloud container clusters create fancy-cluster --num-nodes 3
- Now run the following command and see the cluster’s three worker VM instances:
gcloud compute instances list
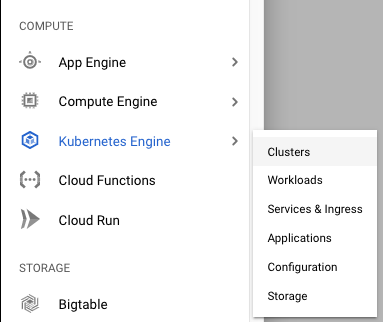
- Find your Kubernetes cluster and related information in the Google Cloud console. Click the Navigation menu, then scroll down to Kubernetes Engine and click Clusters.

- You should see your cluster named fancy-cluster.

Clone source repository & run application in Cloud Shell
- Run the following commands to clone the git repo to your Cloud Shell instance:
cd ~
git clone https://github.com/googlecodelabs/monolith-to-microservices.git
- Change to the appropriate directory. You will also install the NodeJS dependencies so you can test your application before deploying:
cd ~/monolith-to-microservices
./setup.sh
- Ensure you are running Cloud Shell with the latest version of
npm:nvm install --lts
- Change to the appropriate directory and test the application by running the following command to start the web server:
cd ~/monolith-to-microservices/monolith
npm start
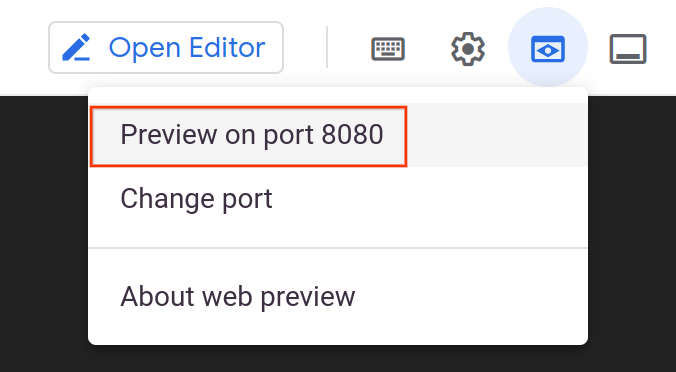
- You can preview your application by clicking the web preview icon and selecting Preview on port 8080:

- This should open a new window where you can see our Fancy Store in action!

- Leave this tab open, you’ll return to it later in the lab.
- To stop the web server process, press
CTRL+Cin Cloud Shell.
Create Docker container with Cloud Build
- First, to make sure you have the Cloud Build API enable, run the following command:
gcloud services enable cloudbuild.googleapis.com
- Run the following to start the build process:
cd ~/monolith-to-microservices/monolith
gcloud builds submit --tag gcr.io/${GOOGLE_CLOUD_PROJECT}/monolith:1.0.0 . - To view your build history or watch the process in real time by clicking the Navigation menu and scrolling down to Tools section, then click Cloud Build > History. Here you can see a list of all your previous builds.

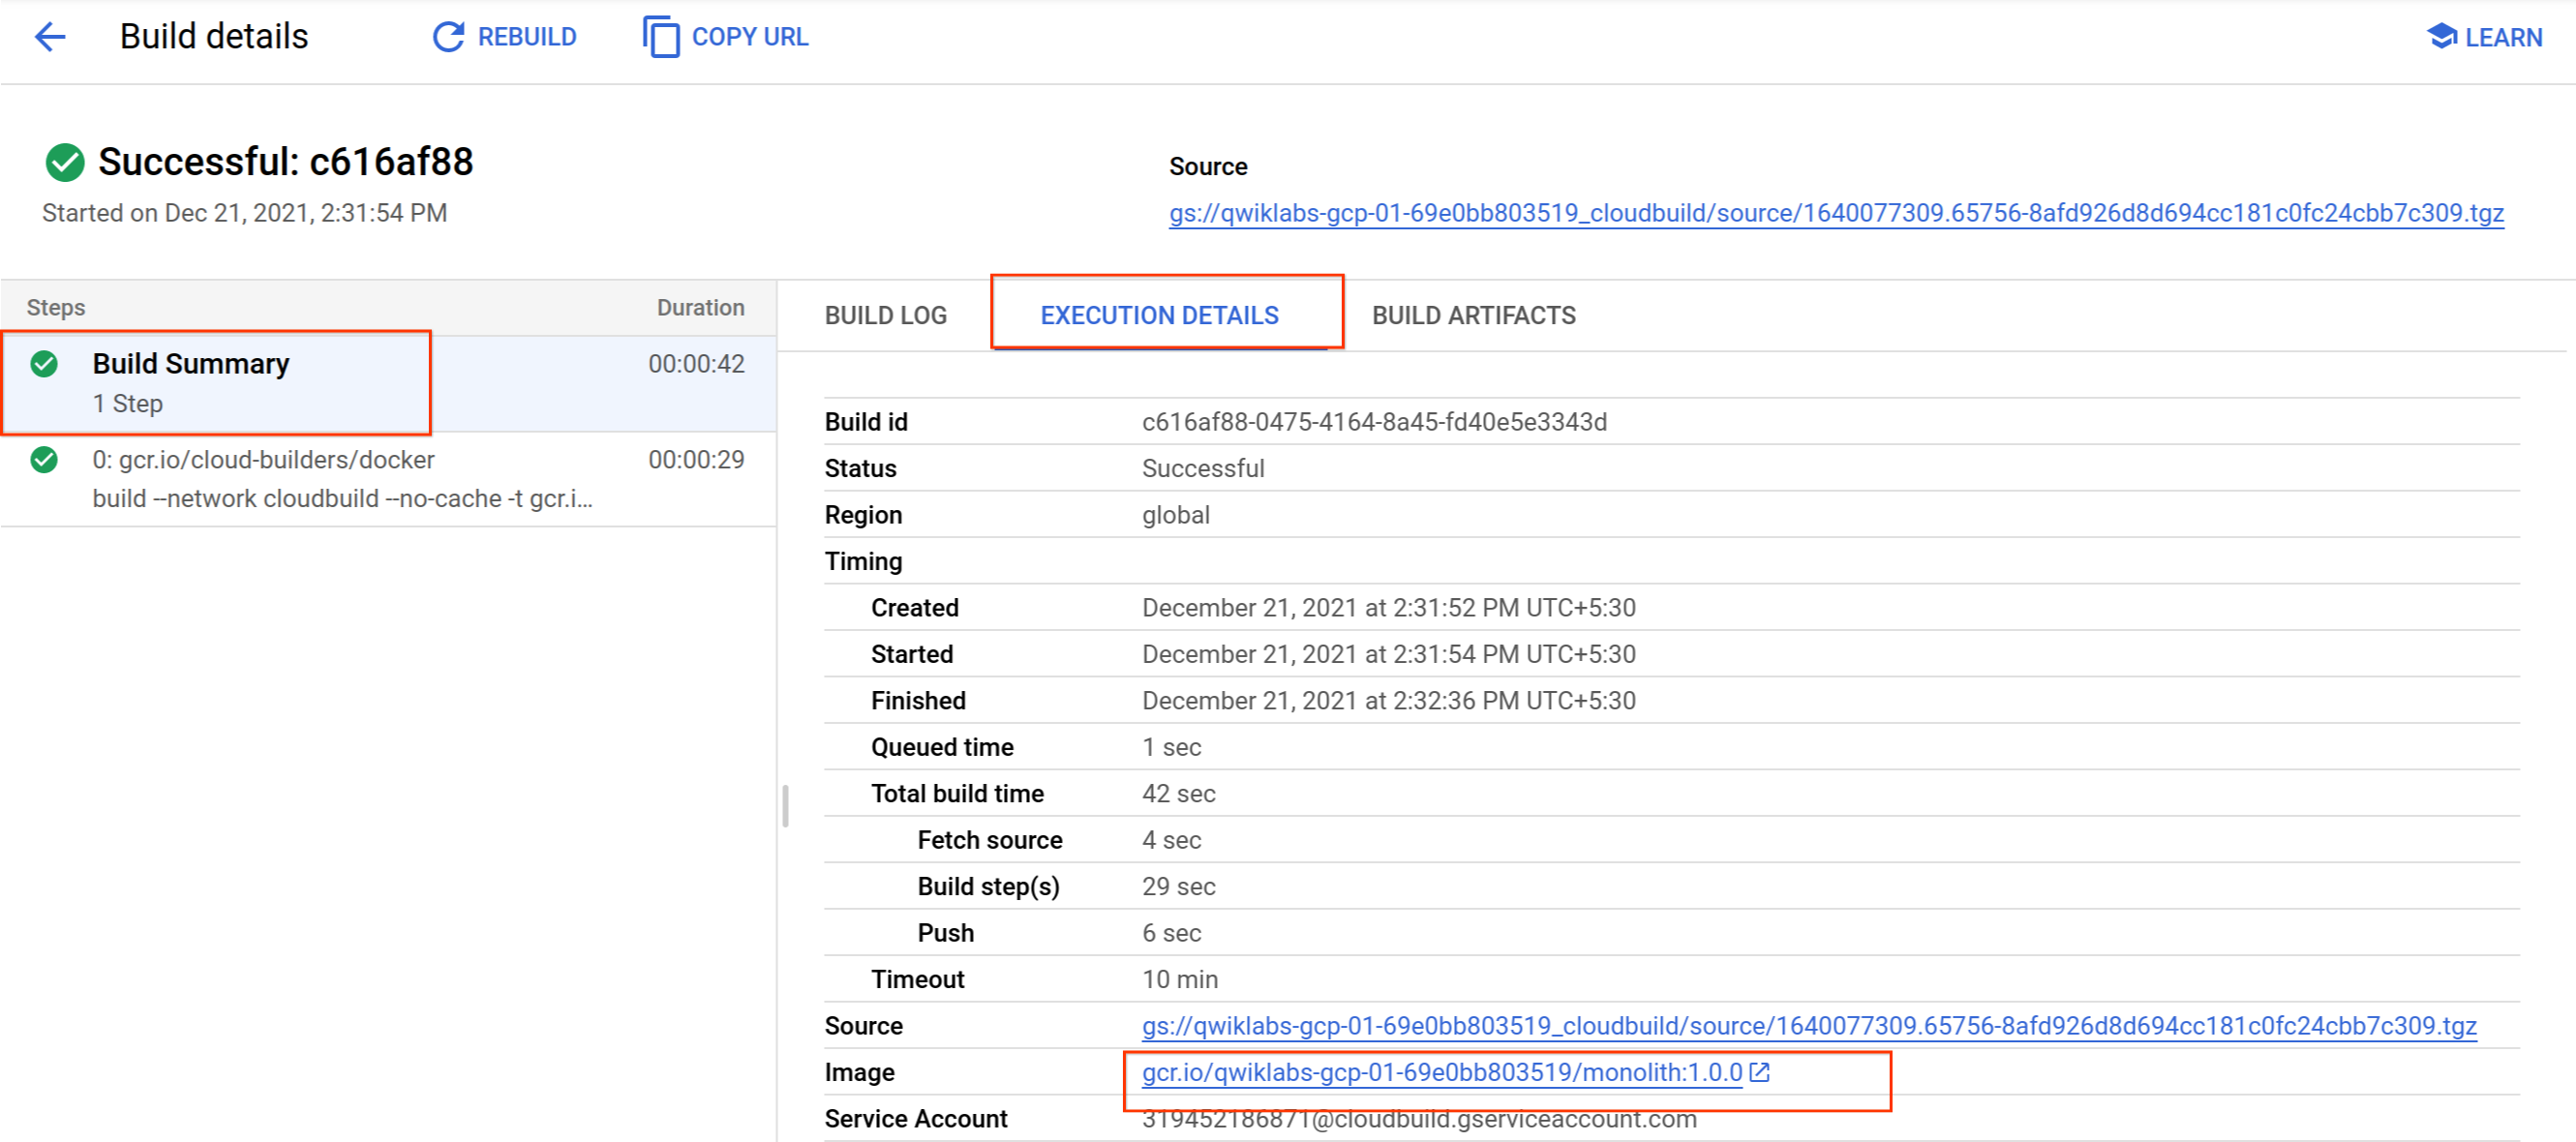
- Click on the build name to see all the details for that build including the log output.
Optional: From the Build details page, click on the Build summary > Execution details > Image name in the build information section to see the container image:

Deploy container to GKE
- Run the following command to deploy your application:
kubectl create deployment monolith --image=gcr.io/${GOOGLE_CLOUD_PROJECT}/monolith:1.0.0 - Verify the Deployment was created successfully:
kubectl get all
Expose GKE Deployment
- Run the following command to expose your website to the Internet:
kubectl expose deployment monolith --type=LoadBalancer --port 80 --target-port 8080
- GKE assigns the external IP address to the Service resource, not the Deployment. If you want to find out the external IP that GKE provisioned for your application, you can inspect the Service with the
kubectl get servicecommand:kubectl get service
Scale GKE deployment
- In Cloud Shell, run the following command to scale you deployment up to 3 replicas:
kubectl scale deployment monolith --replicas=3
- Verify the Deployment was scaled successfully:
kubectl get all
Make changes to the website
- Run the following commands copy the updated file to the correct file name:
cd ~/monolith-to-microservices/react-app/src/pages/Home
mv index.js.new index.js
- Print its contents to verify the changes:
cat ~/monolith-to-microservices/react-app/src/pages/Home/index.js
- Run the following command to build the React app and copy it into the monolith public directory:
cd ~/monolith-to-microservices/react-app
npm run build:monolith
- Run the following command to trigger a new cloud build with an updated image version of 2.0.0:
cd ~/monolith-to-microservices/monolith
gcloud builds submit --tag gcr.io/${GOOGLE_CLOUD_PROJECT}/monolith:2.0.0 .
Update website with zero downtime
- Tell Kubernetes that you want to update the image for your deployment to a new version with the following command:
kubectl set image deployment/monolith monolith=gcr.io/${GOOGLE_CLOUD_PROJECT}/monolith:2.0.0 - You can validate your deployment update by running the following command:
kubectl get pods
Here you will see 3 new pods being created and your old pods getting shut down. You can tell by the age which are new and which are old. Eventually, you will only see 3 pods again which will be your 3 updated pods.
Cleanup
- Delete Google Container Registry images:
# Delete the container image for version 1.0.0 of the monolith gcloud container images delete gcr.io/${GOOGLE_CLOUD_PROJECT}/monolith:1.0.0 --quiet # Delete the container image for version 2.0.0 of the monolith gcloud container images delete gcr.io/${GOOGLE_CLOUD_PROJECT}/monolith:2.0.0 --quiet - Delete Google Cloud Build artifacts from Google Cloud Storage:
# The following command will take all source archives from all builds and delete them from cloud storage # Run this command to print all sources: # gcloud builds list | awk 'NR > 1 {print $4}' gcloud builds list | grep 'SOURCE' | cut -d ' ' -f2 | while read line; do gsutil rm $line; done - Delete GKE Service:
kubectl delete service monolith
kubectl delete deployment monolith
- Delete GKE Cluster:
gcloud container clusters delete fancy-cluster
Tag:Google Cloud
