Configuring PIM for privilege for AAD Roles
Configure Azure AD role settings in Privileged Identity Management
- Sign in to Azure portal with a user in the Privileged Role Administrator role.
- Open Azure AD Privileged Identity Management > Azure AD roles > Role settings.
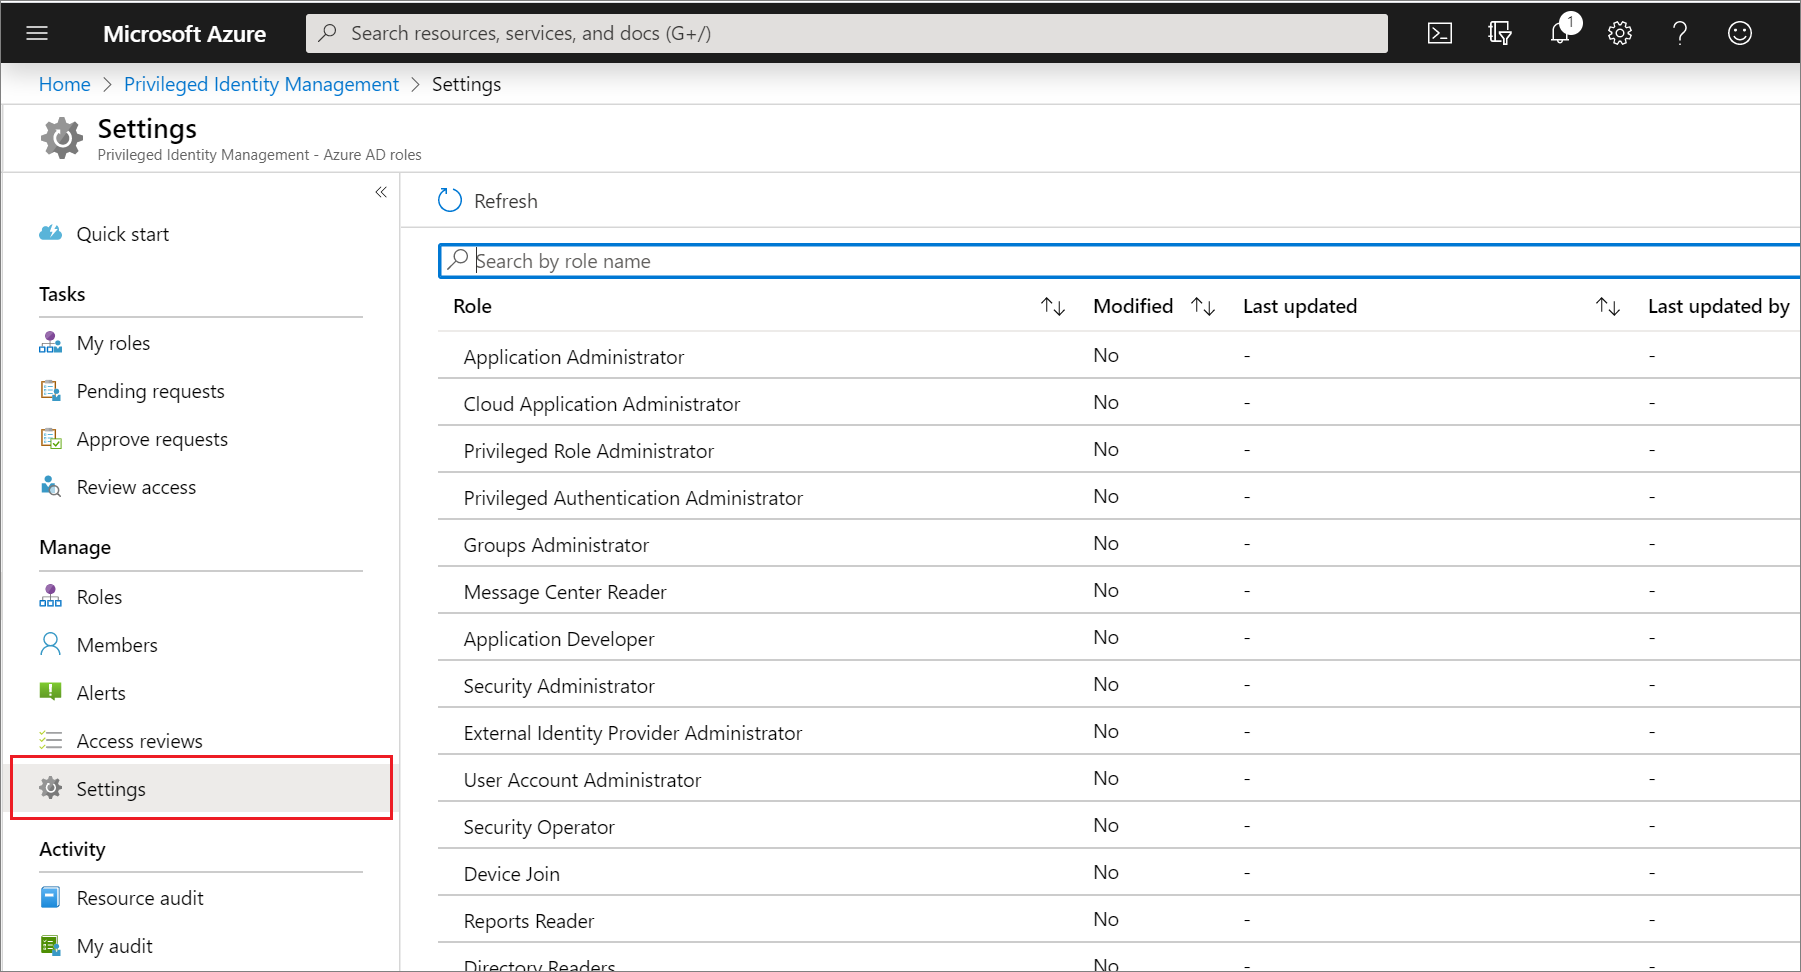
- Select the role whose settings you want to configure

- Select Edit to open the Role settings page.
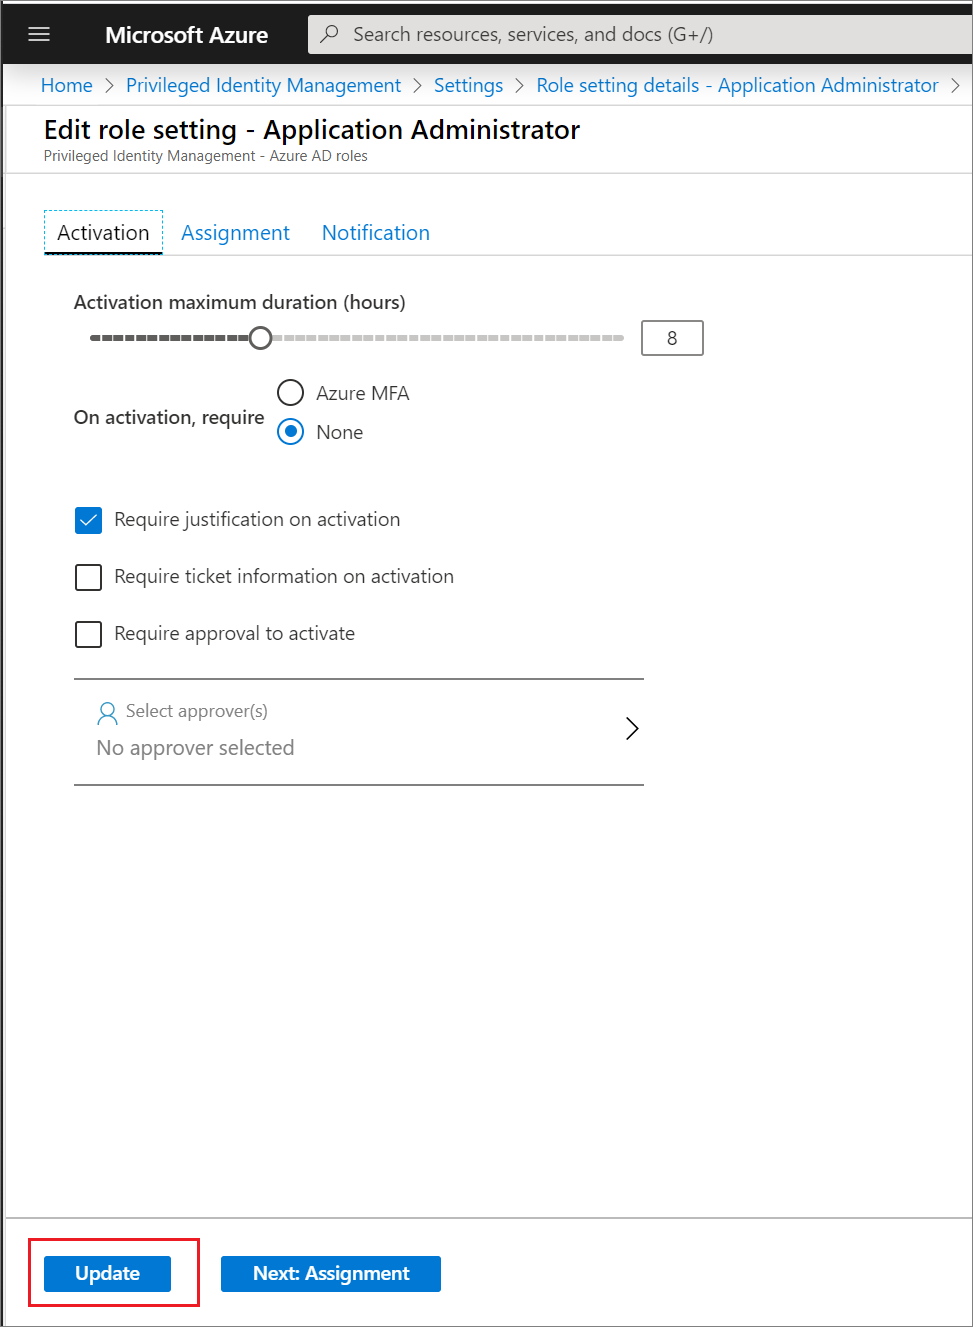
On the Role setting pane for each role, there are several settings you can configure.
Assign Azure AD roles in Privileged Identity Management
- Sign in to Azure portal with a user that is a member of the Privileged role administrator role.
- Open Azure AD Privileged Identity Management.
- Select Azure AD roles.
- Select Roles to see the list of roles for Azure AD permissions.

- Select Add assignments to open the Add assignments page.
- Select Select a role to open the Select a role page.
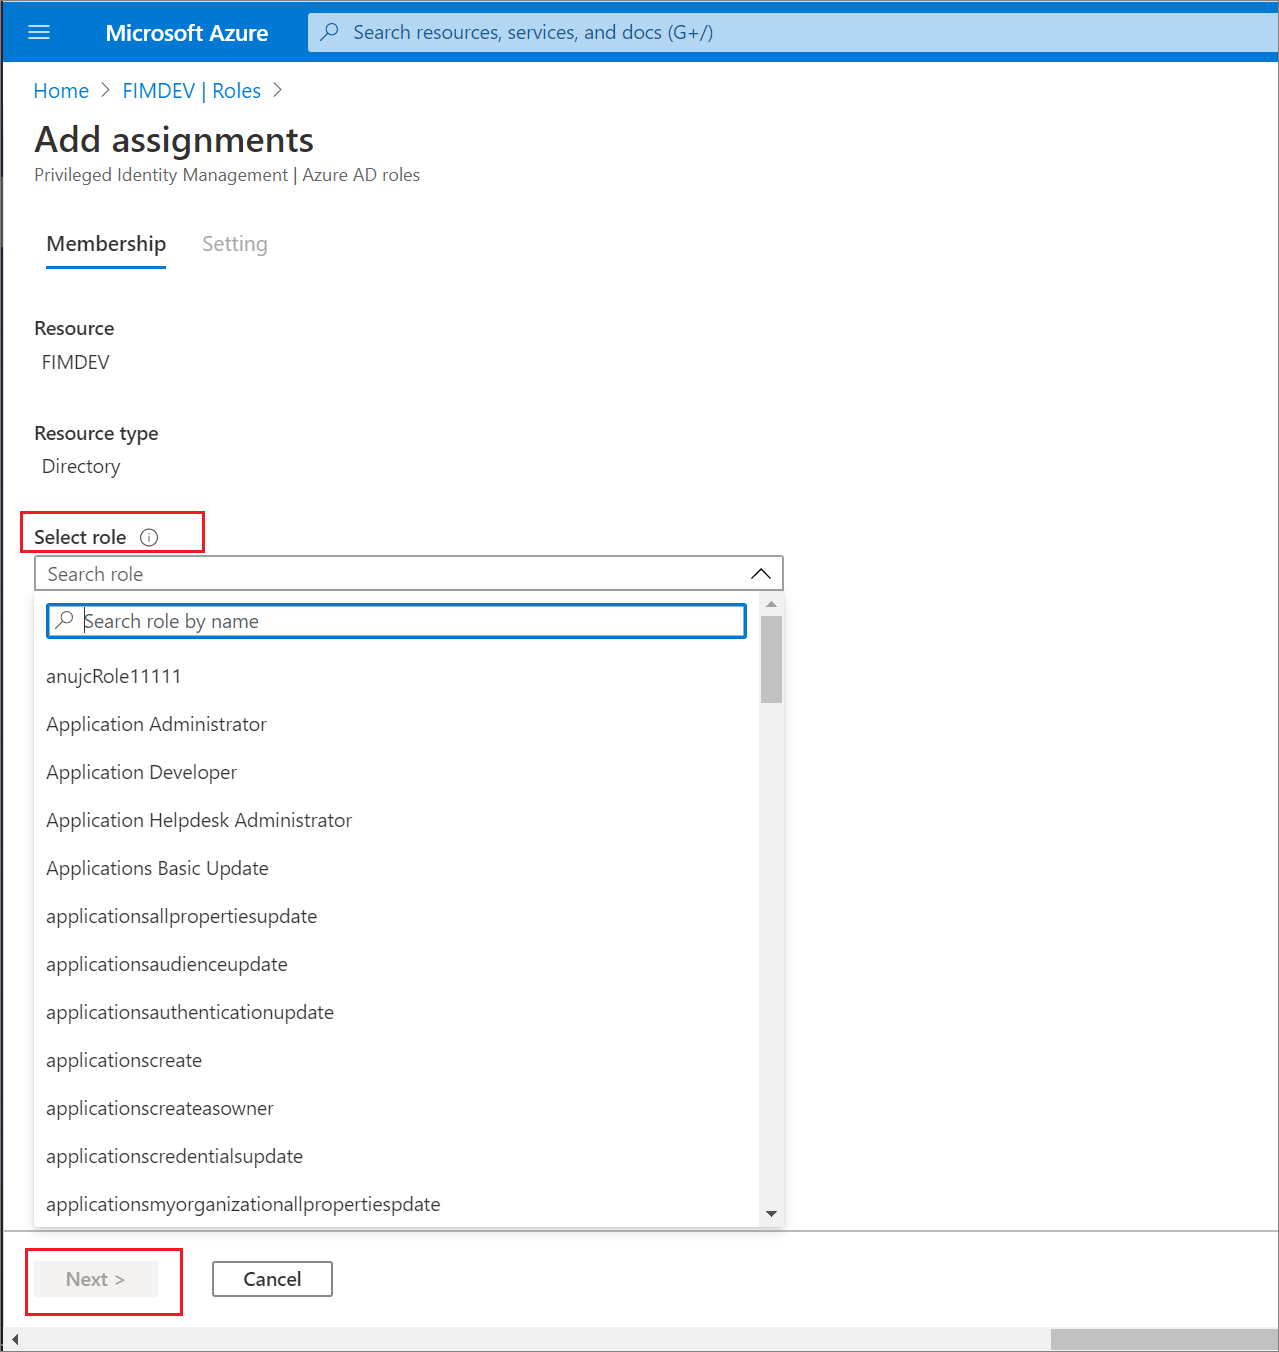
- Select a role you want to assign, select a member to whom you want to assign to the role, and then select Next.
- In the Assignment type list on the Membership settings pane, select Eligible or Active.
- Eligible assignments require the member of the role to perform an action to use the role. Actions might include performing a multi-factor authentication (MFA) check, providing a business justification, or requesting approval from designated approvers.
- Active assignments don’t require the member to perform any action to use the role. Members assigned as active have the privileges assigned to the role at all times.
- To specify a specific assignment duration, add a start and end date and time boxes. When finished, select Assign to create the new role assignment.
- Permanent assignments have no expiration date. Use this option for permanent workers who frequently need the role permissions.
- Time-bound assignments will expire at the end of a specified period. Use this option with temporary or contract workers, for example, whose project end date and time are known.

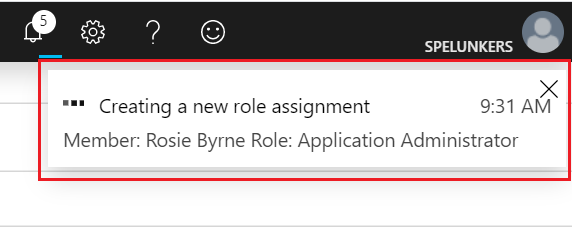
- After the role is assigned, an assignment status notification is displayed.
Activate an Azure AD role in PIM
- Sign in to the Azure portal.
- Open Azure AD Privileged Identity Management. For information about how to add the Privileged Identity Management tile to your dashboard, see Start using Privileged Identity Management.
- Select My roles, and then select Azure AD roles to see a list of your eligible Azure AD roles.

- In the Azure AD roles list, find the role you want to activate.

- Select Activate to open the Activate pane.
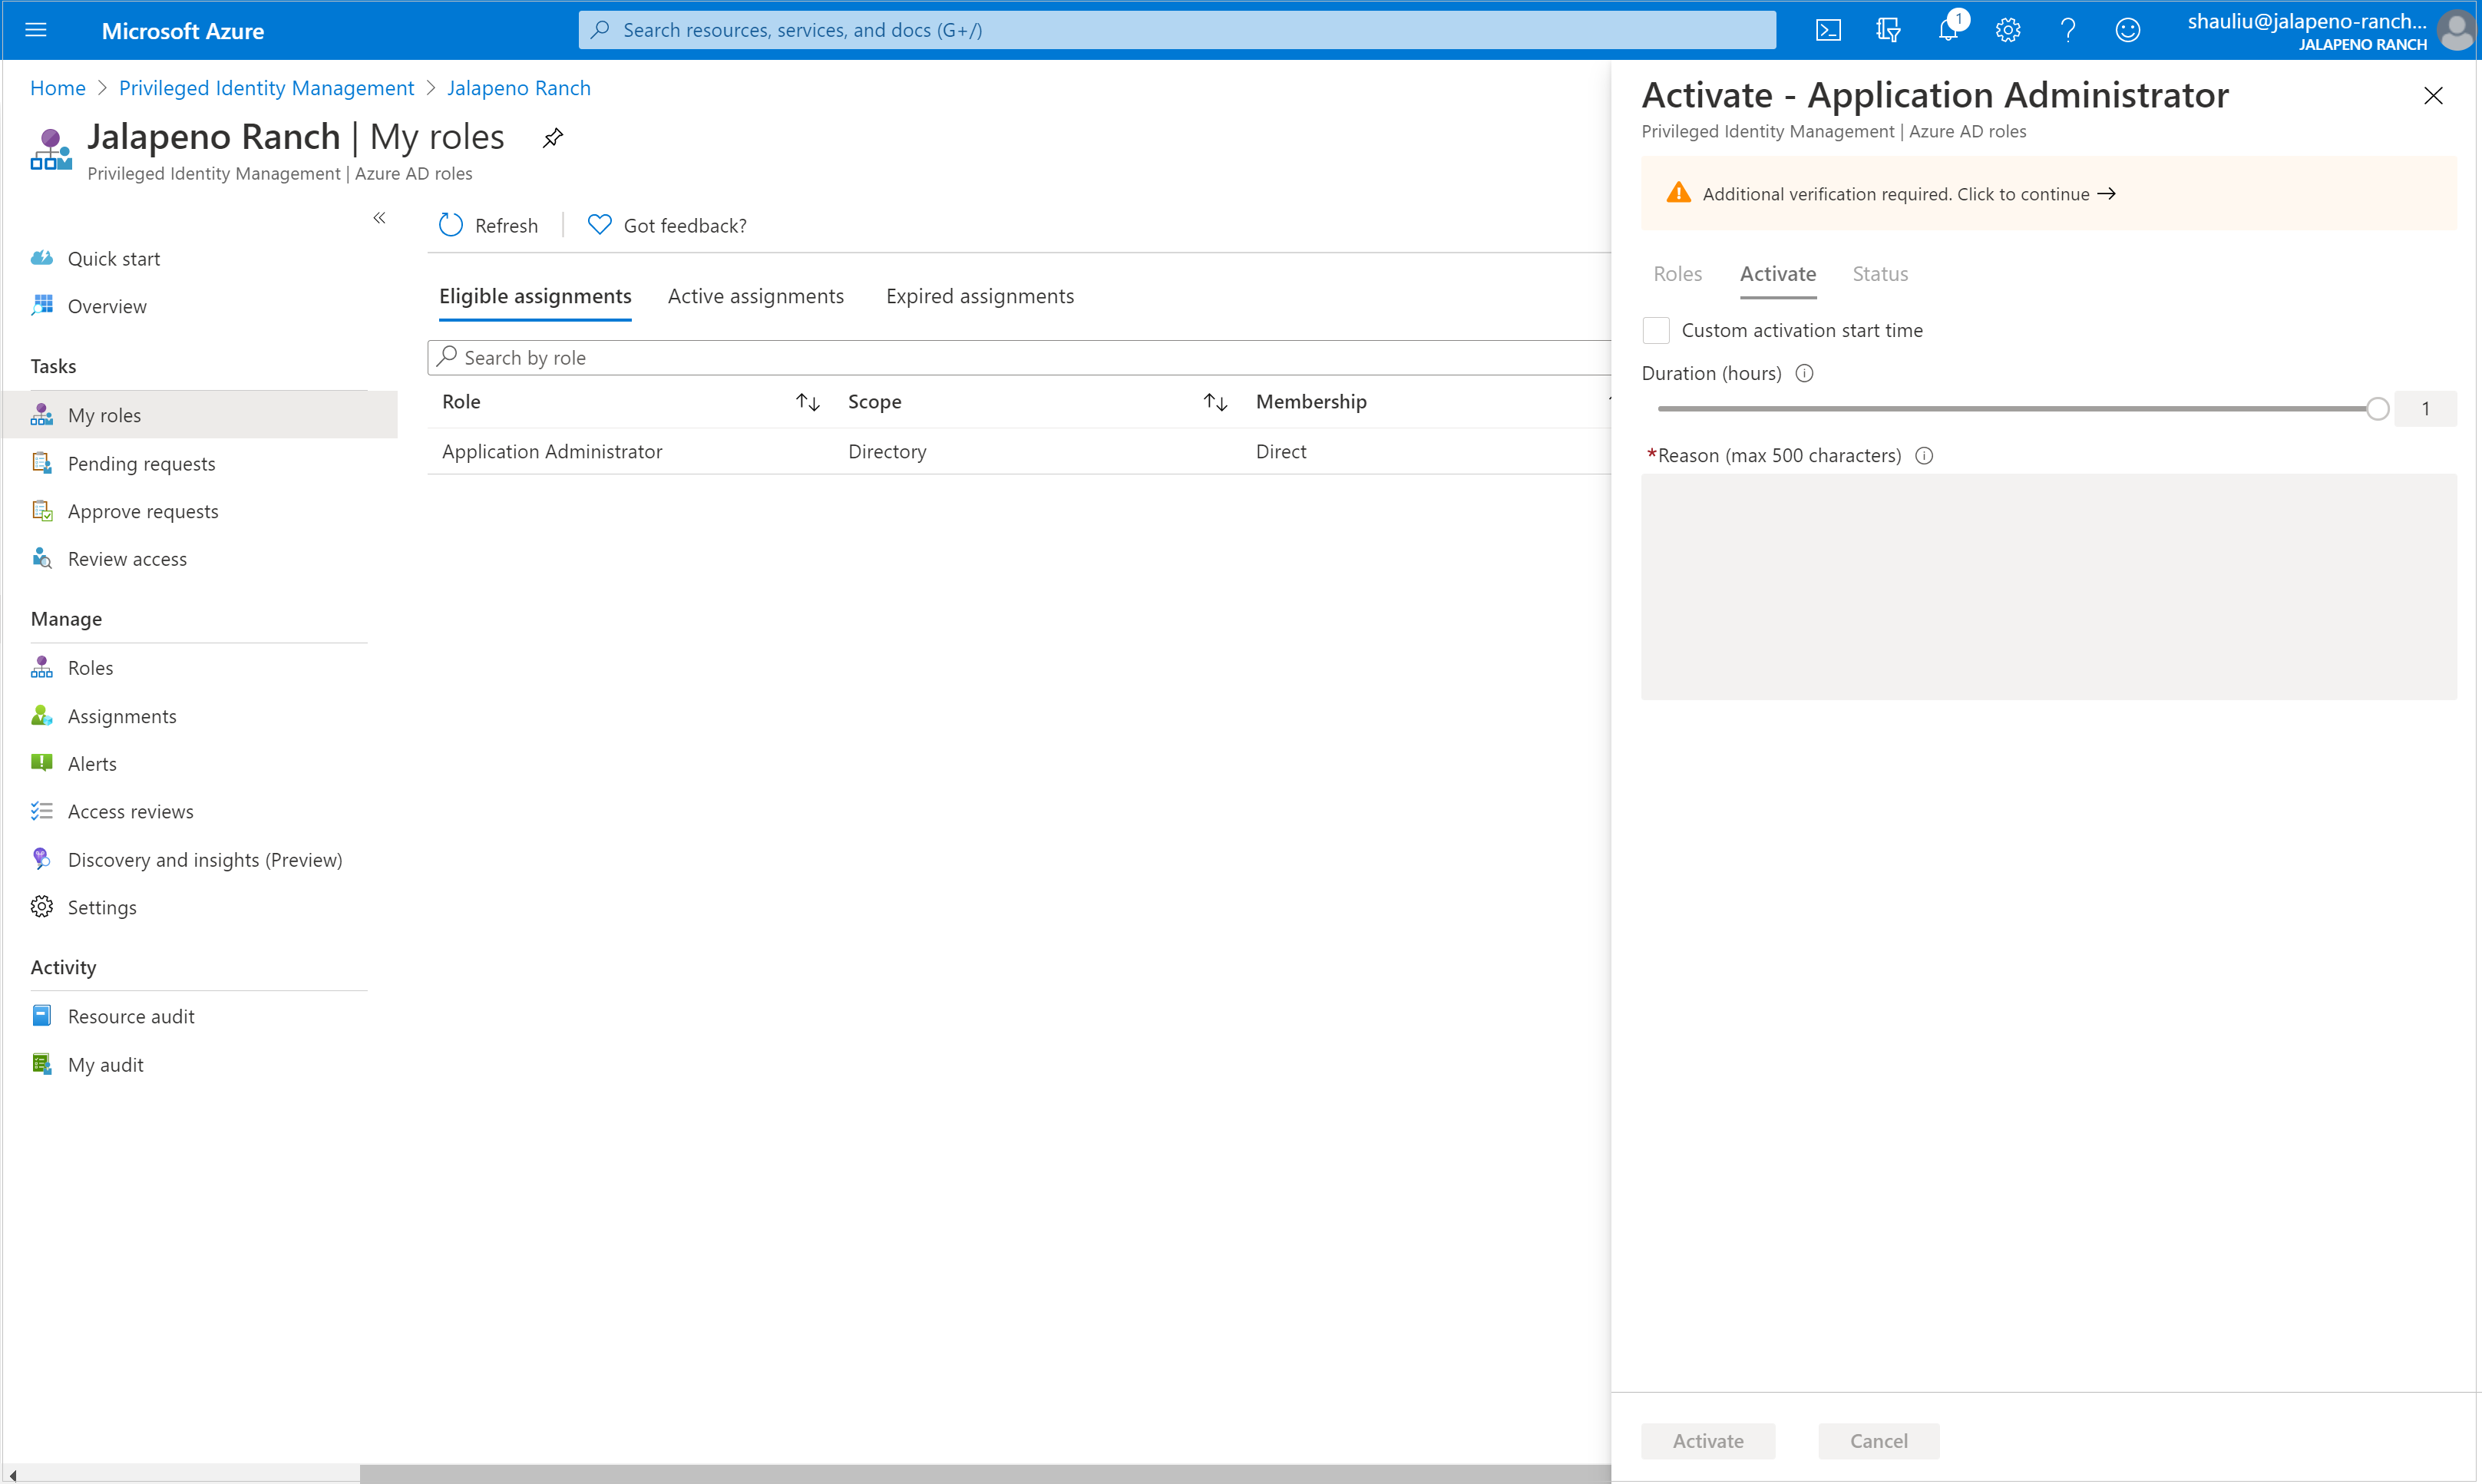
- Select Additional verification required and follow the instructions to provide security verification. You are required to authenticate only once per session.
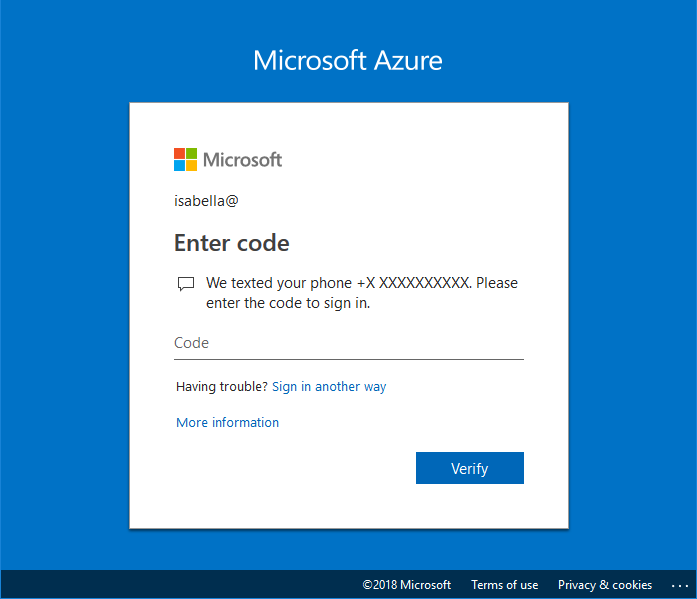
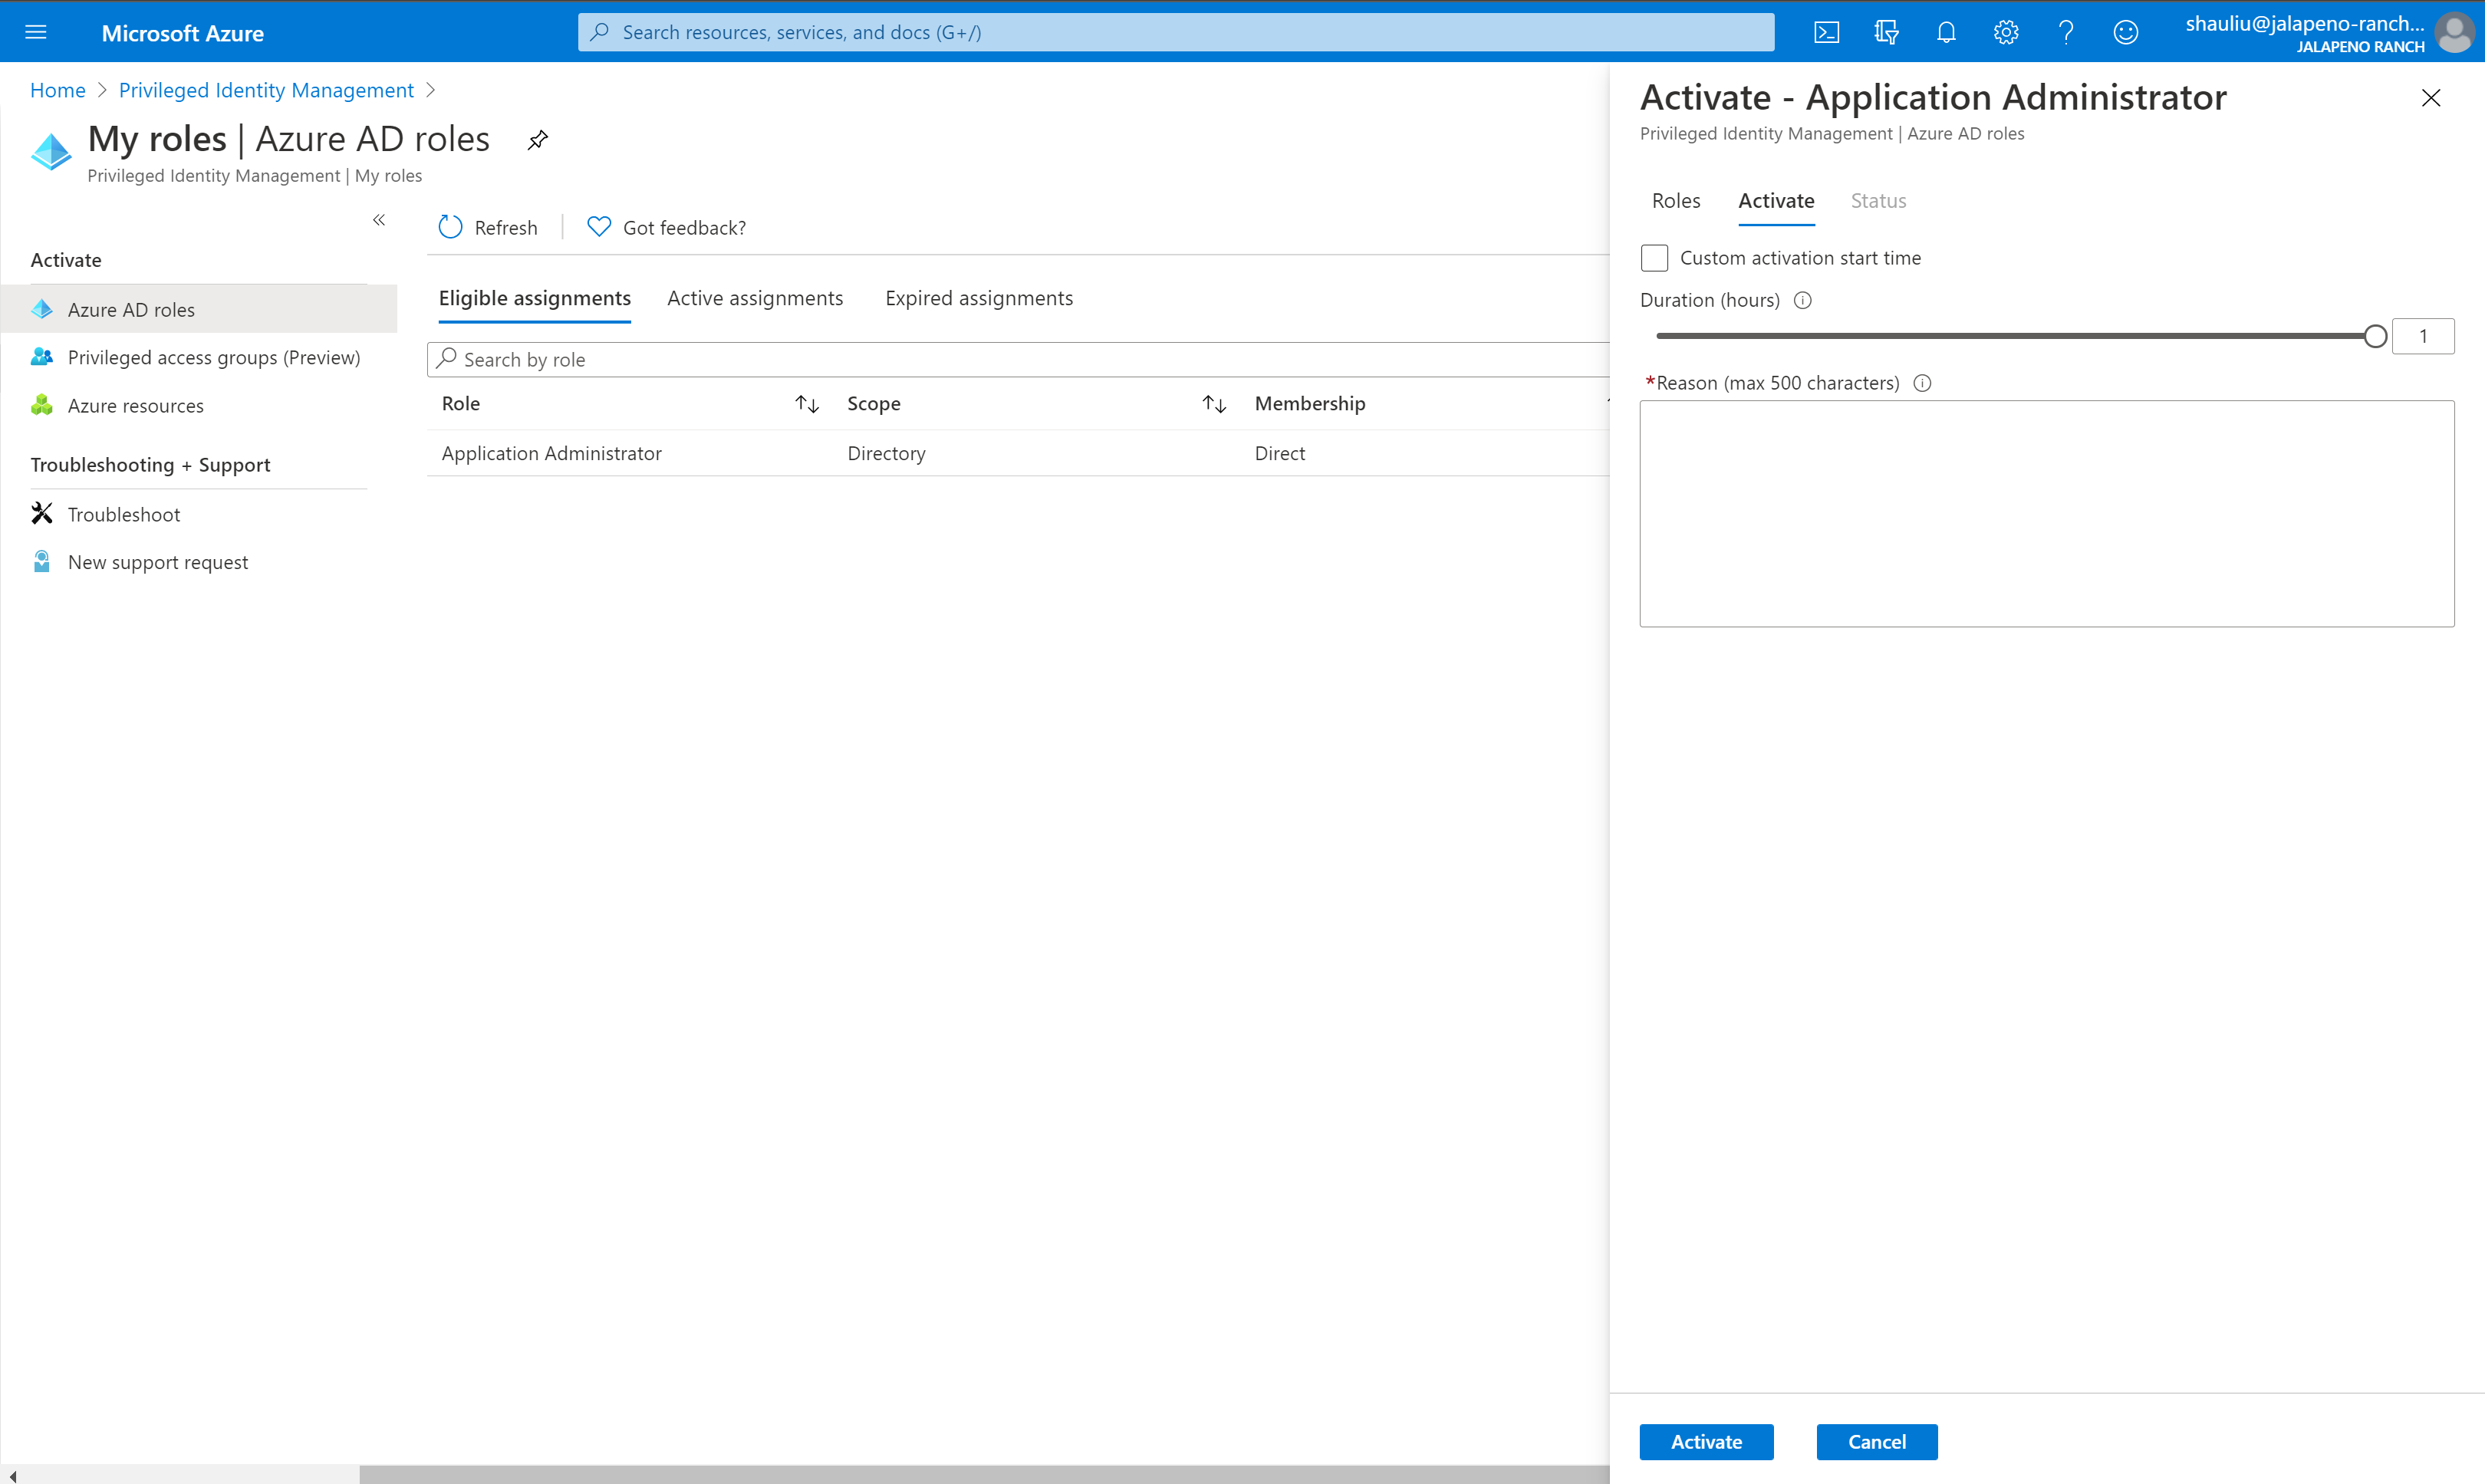
- After multifactor authentication, select Activate before proceeding.
- If you want to specify a reduced scope, select Scope to open the filter pane. On the filter pane, you can specify the Azure AD resources that you need access to. It’s a best practice to request access to the fewest resources that you need.
- If necessary, specify a custom activation start time. The Azure AD role would be activated after the selected time.
- In the Reason box, enter the reason for the activation request.
- Select Activate.
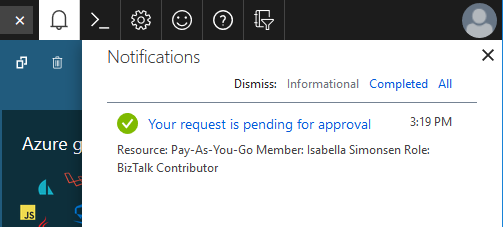
If the role requires approval to activate, a notification will appear in the upper right corner of your browser informing you the request is pending approval.
Tag:Azure
