Creating Custom RBAC Role for Resource Access
- In the Azure portal, open a subscription or resource group where you want the custom role to be assignable and then open Access control (IAM).
- Click Add and then click Add custom role.
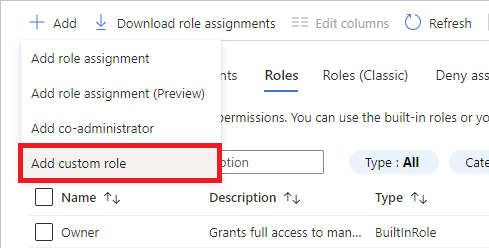 This opens the custom roles editor with the Start from scratch option selected.
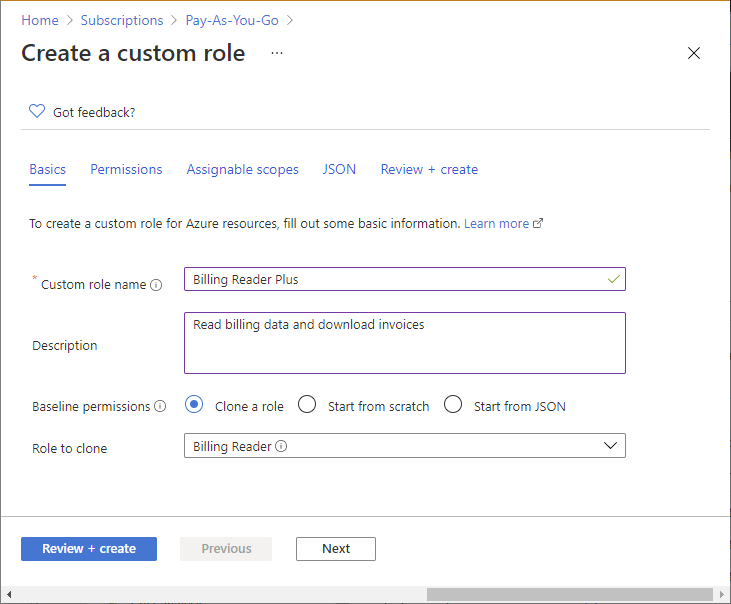
 - In the Custom role name box, specify a name for the custom role. The name must be unique for the Azure AD directory. The name can include letters, numbers, spaces, and special characters.
- In the Description box, specify an optional description for the custom role. This will become the tooltip for the custom role.
The Baseline permissions option should already be set based on the previous step, but you can change.
- On the Permissions tab, you specify the permissions for your custom role. Depending on whether you cloned a role or if you started with JSON, the Permissions tab might already list some permissions.
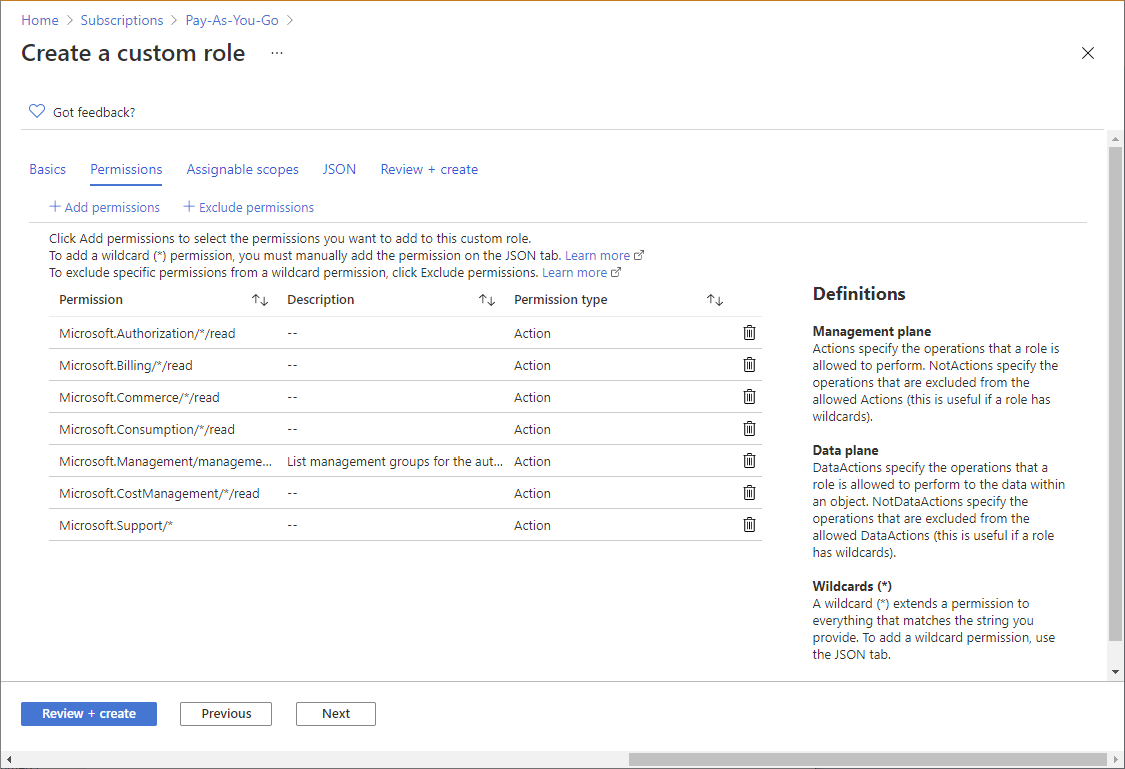
- To add permissions, click Add permissions to open the Add permissions pane.
This pane lists all available permissions grouped into different categories in a card format. Each category represents a resource provider, which is a service that supplies Azure resources. - In the Search for a permission box, type a string to search for permissions. For example, search for invoice to find permissions related to invoice.
A list of resource provider cards will be displayed based on your search string. For a list of how resource providers map to Azure services
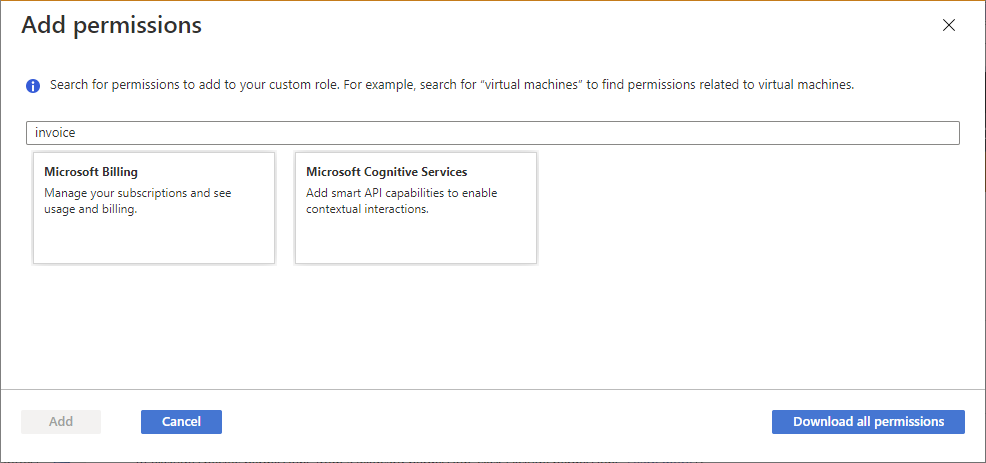
- Click a resource provider card that might have the permissions you want to add to your custom role, such as Microsoft Billing.
A list of the management permissions for that resource provider is displayed based on your search string.
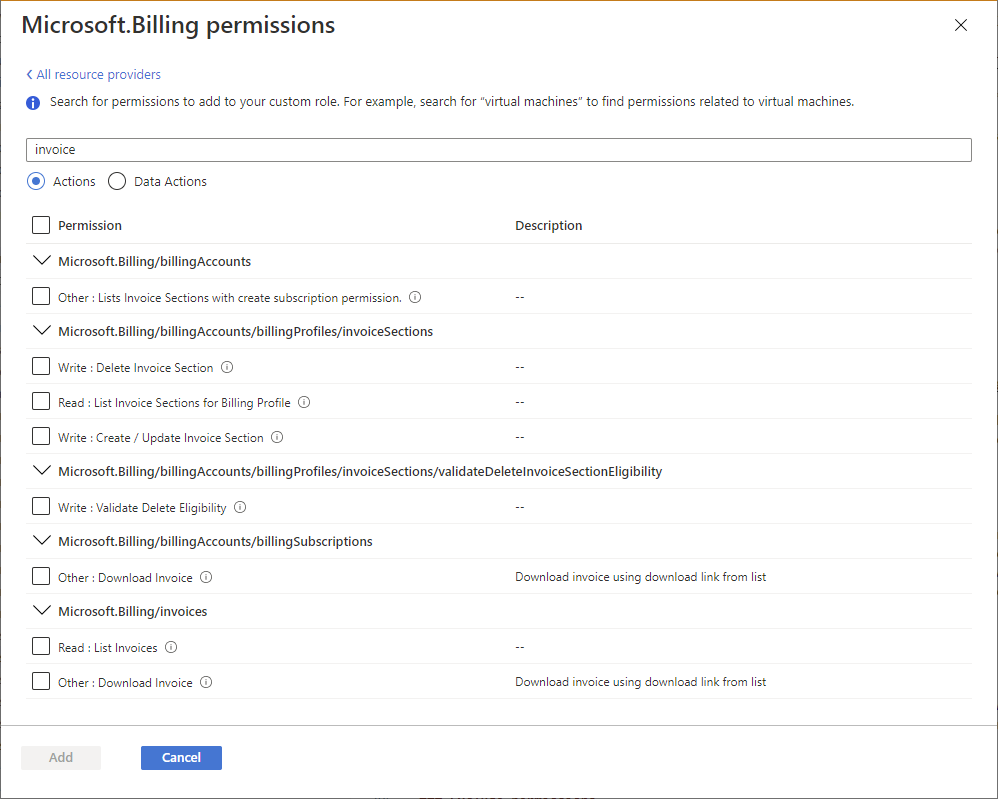
- If you are looking for permissions that apply to the data plane, click Data Actions. Otherwise, leave the actions toggle set to Actions to list permissions that apply to the control plane. For more information, about the differences between the control plane and data plane
- If necessary, update the search string to further refine your search.
- Once you find one or more permissions you want to add to your custom role, add a check mark next to the permissions. For example, add a check mark next to Other : Download Invoice to add the permission to download invoices.
- Click Add to add the permission to your permission list.
The permission gets added as anActionsor aDataActions.
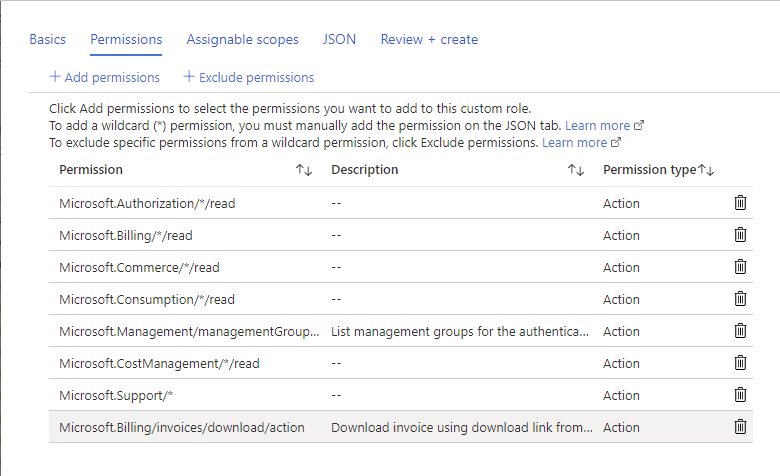
- Click Add assignable scopes to open the Add assignable scopes pane.
- Click one or more scopes that you want to use, typically your subscription.
- Click the Add button to add your assignable scope.
- Review your custom role settings.
- Click Create to create your custom role.
Tag:Azure
